Showing posts with label Marina. Show all posts

Friday, December 4, 2015

Feliz Navidad

Hi everyone! Marina here! Of course, I will be doing something Christmas related! Hehe, I'm in such a Christmas mood so I hope this would give you some ideas if you are planning to make some christmas cards. If you're like me and you are stuck with the few christmas sets that you have, I hope this post will give you some ideas on how you can use your non- christmas sets to make a christmas card.


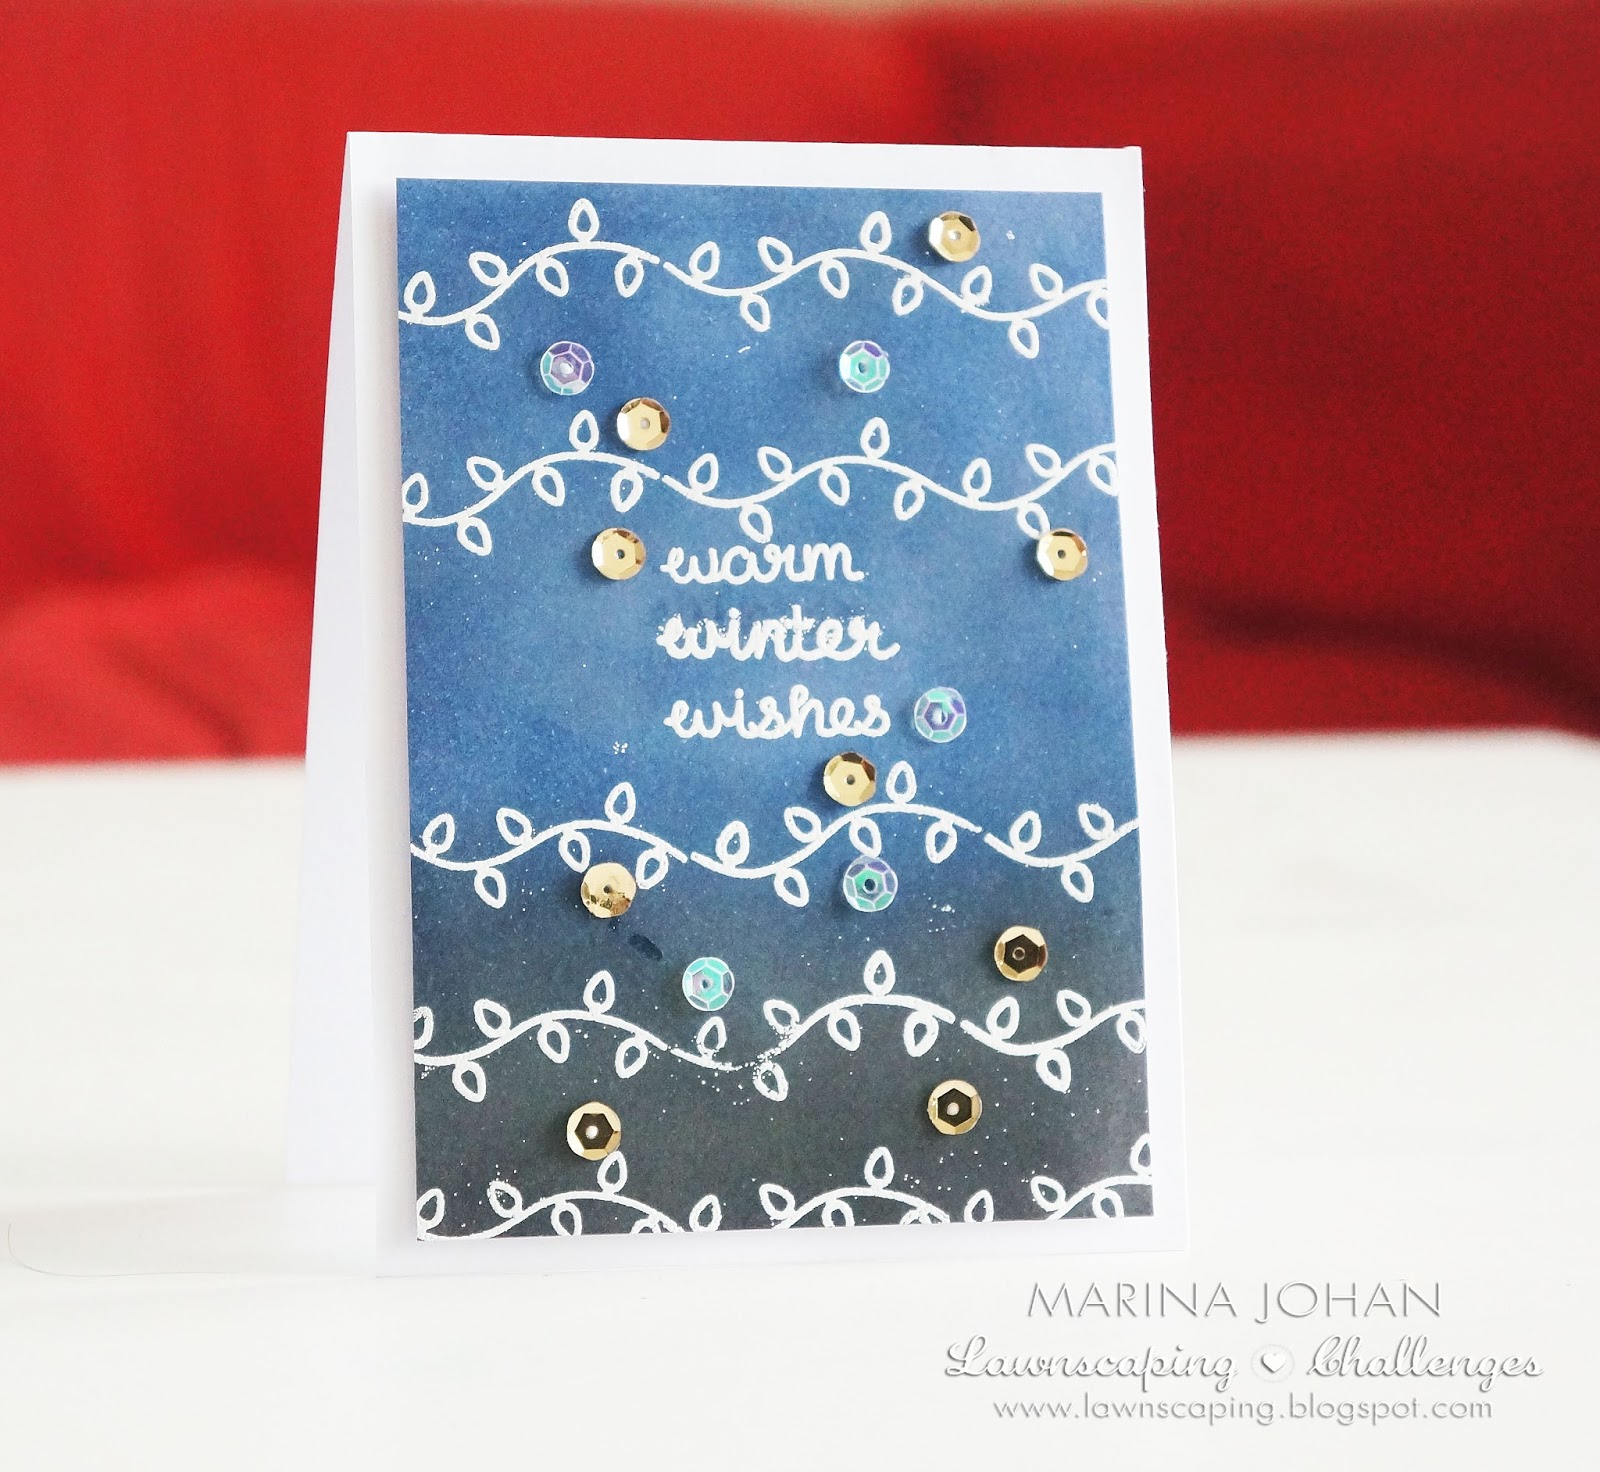
I know I did use the christmas sets to make this card but, you can look through the sets you can have pick up small items like gift boxes, flowers, starts etc to make your own background.  I used the tiny images from the baaah humbug set. I usually like to fill the whole card base but I thought I'll just put it at the bottom and use Peeled Paint Distress Ink to add quick colour. The red and gold are just some stickles. You can also use copics or other things that you have.

I used the violet's ABC to make my own customised sentiment to combine with the baaah humbug set. That's really it.  :D I hope you are inspired and I would love to see what cards you've been making.


I hope it will inspire you to find more looks for your stamps! Cheers!

Friday, November 6, 2015

Miss You - Stretching Your Stamps

Hi everyone! Marina here! For today's card, I wanted to use the theme for the current Lawnscaping Challenge and taking this opportunity to share with you an idea how another way of using the gumball machine from the Sweet Smiles set.


So, I started off by masking away the balls in the machine and used the Distress Ink in Antique Linen to stamp as I want the border to be as light as possible.


 I like using my copic markers when I want my images to turn our sharp and vibrant. In the final image, you will notice that I've covered the brown area with some gold stickles. I thought this would as some nice shimmering touch to the card.


I've coloured a white paper with pink copic markers before using the string of hearts die from the Stitched Journal Card die set.


As for the sentiment, I took it from the Chit Chat set and masked away the bubble around the words before stamping.


I hope it will inspire you to find more looks for your stamps! Cheers!

Friday, October 2, 2015

2 Stamps, 2 Different Looks

Hi everyone! Marina here! I actually made a video for these cards but my imovie was being weird :( Hopefully it'll work next time, so I hope you'll look out for my post next month!

I would like to share two very simple cards using only 2 stamps but producing two very different looks! The lights and sentiments are from the Baaaah Humbug stamp set.

For the first card, I wanted to keep it one layer and bright and colourful. I just took the lights and start to stamp them next to each other. Colouring the bulbs with copics and adding some gold stickles for some shimmer.


The next one is more night time look.  I used Black Soot & Faded Jeans for the night sky look. Instead of colouring the bulbs, I just embossed it with Hero Arts white embossing powder and used Pretty Pink Posh sequins for embellishments.


I hope it will inspire you to find more looks for your stamps! Cheers!

Wednesday, July 15, 2015

Copic No-Colouring Galore

Hi everyone! Marina here! I'm sure this technique isn't new to everyone but I would still like to share this card and share some tips I've learn and hopefully, it would benefits you.

You can use any light copic friendly ink. I use Distress Ink. Mainly because it's the only ink line that I have many colours of. I used the images from the Sweet Smiles set.

Tip 1 : I stamped the machine off to the side to create some kind of dimension even though everything is more or less one layer except for the sentiment. I really like doing this especially for one layer card.


Tip 2 : The great thing about no-line colouring is, you don't have to trouble yourself and create a mask. If you can see it in the image above, some of the balls overlaps. But because you will not see the line in the end result, this doesn't matter :) 


I hope you like this card as much as I did :) 

Thursday, June 11, 2015

One Layer Card - Copic Colouring on Kraft

Hi everyone :) It's Marina! Anyone love making one layer cards? I do! Today, I'm sharing with you a one layer card using kraft cardstock. Hope you'll stick around and read on :)


I started off by stamping the sentiment first and embossed it in white. I used washi tape to keep the sides of the card clean when I do my stamping to make a nice frame. 


I used a brown ink to stamp the frames first before filling the frames with some bugs and leaves.


After that, I used my copics to colour the images. It's pretty easy however, you should be light handed with it. And remember that the copic colours will not come out as vibrant as it would be if you used it on white paper.


Hope you'll give this a try! 

Thursday, May 14, 2015

Combining Two Stamp Sets

Hi everyone! It's Marina! I thought a lot about this post and I always love to try to include a technique to share but today, I was looking through my stamp stash and I wanted to combine two stamp sets together because I feel that this is a way I could stretch the use of my sets.

I began by choosing these two sets. Hello Sunshine & Love You A Latte.


I used various inks to stamp out the heart and circle balloons. I've also cut them out and left a thin white border around it with my scissors.


On a piece of Neenah Solar White cardstock, I've stamped the mug and using a post-it as a masking paper, I took the balloon strings and stamp over the cup. I wanted to have balloons coming out of the cup. 


I've layered the top portion with a paper from the Let's Polka paper pack.


Hope this inspires you to combine your new and older sets together. Take care!


Thursday, April 9, 2015

Watercolouring With Gold Embossed Images

Hi everyone! It's Marina! The Lawnscaping Challenge for this week is to add dimension/texture to your cards, so I thought I'd share with you a pretty straight forward way to use watercolour and make it look more "texture-y". I hope it will make sense later.


I wanted to use hearts, so I took two stamp sets, Bugs & Kisses and Science of Love. I took those solid & outlined hearts from these sets.


I've stamped them randomly and heat embossed it with gold embossing powder. I think I used Ranger Gold Embossing powder. I had painters tape to the sides because I wanted to have a clean white border around it. 


To add some shimmer to my watercolours, I used my Winsor & Newton Iridescent Medium and dabbed it to my stamping block. I'll then add more watercolours to it and mixed them.


This gives a nice shimmering finish. This is my alternative to the Wink of Stella. I find that this is more cost effective because I paid more or less the same about if I were to buy one Wink of Stella. I highly recommend for you to get this.


I started to just add my watercolours to the card base. You can go as light or as dark as you want. I just wanted a mixed of both orange and pink. I dried the piece when I wanted to add more colours and make it look darker.

I added my sentiment and some strings to the back of my die cut piece with some gold sequins from Pretty Pink Posh to match and that's it! You can do this with any images you heart desires :)


Thanks for stopping by! I would love to see your take on this.

Thursday, March 12, 2015

Clean & Simple Die Cutting

Hi everyone! It's Marina! The Lawnscaping Challenge #101 - Dots and/or Stripes has been putting me in a polka dot buzz so I'm here to share with you a very easy way to make use of your stackables die cut.


Since I only have the Large Stitched Circle Stackables, I could only get in 4 colours but if you have the full set, you can make a fun full rainbow or ombre!

I started by die cutting each Let's Polka paper with two circle dies. I want to minimize the bulk and this way, I can do some inlaid die-cutting.


Once you've die cut all your stackables, you can line them up into each other like this


 Take your choice of sentiment and you're done!

Try this technique with not only circles but square or rectangles :) 


Thanks for stopping by! I would love to see your take on this.

Saturday, February 14, 2015

Falling (Die cut) Hearts!

Hi everyone! It's Marina :) So sorry, I know that I was supposed to post on Thursday but I had some delays for my flight and I got home late. I'm here now to share with you a card using some heart dies.


I'm taking various copic markers in different shades of pink and red. You can use any colour combinations or other types of medium, watercolour or even ink pads. I took the string of hearts die from the Lawn Fawn Stitched Journaling Card Die. I made sure to colour the cardstock first because it's much fasted to colour a big space then tiny hearts but it's your choice :) 


When that's done, I stamped out the jar from Lawn Fawn Bugs & Kisses stamp set from the top of the paper as though it looks like it's pouring out hearts. I decided to use the same concept for my sentiment. I took the letters from Lawn Fawn Milo's ABC and position them in a way that they also looks like they are falling out of the jar.


Tip : Position your letters first then use a large stamp press to pick up all the letters so that you stamp them all at once and with this you can even do multiple cards quickly.

Now I arrange the hearts until I like it and start to glue them down using Tombow liquid glue.


Hope you like it! 


Don't forget to subscribe to the Lawnscaping Challenge blog & join the Lawnscaping facebook group to catch the projects made by the Facebook Inspiration Team.  You can also catch more of me on my blog

Till next time!

Sunday, January 11, 2015

Adding Depth to Patterned Paper

Hi everyone! It's Marina and I hope your new year is doing great.

I have to admit that I am quite the patterned paper hoarder but I find myself using them quite rarely. I'm trying to change that with today's post.

Today I would like to share with you how you can add some depth to your patterned paper.


I used Walnut Stain distress ink to darkened the bottom half of the paper from Sweather Weather paper pack to create some dimension.


I chose this colour scheme because of the inspiration picture in the current lawnscaping challenge where there were some nature and light browns involved :) 


I hope you'll give this technique a try and you use it to enter the ongoing Lawnscaping challenge here.

Thursday, December 11, 2014

Creating Your Own Patterned Paper

Hi everyone! Thanks for coming by to Lawnscaping Challenge blog. It's me, Marina, here again to share with you my last individual post of the year. But there will be a few more Lawnscaping Challenges for the year so catch me and my teammate over at the Lawnscaping Facebook Page.

I'm featuring the Love You a Latte stamp set, the stitched rectangle die and stitched journaling card die by Lawn Fawn. I will show you how to make your own patterned paper.

You can always stamp your choice of images individually but to save time, you can always arrange the images you'd like to use and stick it to your stamping block like I did, in the photo below.

As you can see, we those four images pre-mounted on my block, I can just go on and stamp them repeatedly around the front of my card. I love to stamp some of the parts off the page so that it will look like it's continuous and I've just cut down from a bigger piece of patterned paper.


Don't worry about those empty space because you can take those images individually and fill up the empty space or, you can take those tiny images in the stamp set to fill up the space.


This is my finished card :) 


Hope you've enjoyed my card today and give this technique a try. And don't forget to subscribe to the Lawnscaping blog and Facebook page. And also, to stop by my blog for more ideas!


Thursday, November 13, 2014

Two Cards Using Mirror Stamping

Hi everyone! Thanks for coming by to Lawnscaping Challenge blog. It's me, Marina, here again to share with you not one but two cards :) I am a huge fan of stretch my stamps and I have shown you how you can turn your christmas stamp set to a non-christmas card, vice versa. Today, I'm going to show you how you can stretch the image in your stamp set.

I'm featuring the cutest cup in the Love You a Latte stamp set by Lawn Fawn. I will show you how to make a mirror image of out the cup so that it's facing each other.

First, you have, of course, choose the stamp image that you want to "mirror" then choose another stamp that is bigger than your choice of image. I used this flower image. I stuck my flower image to my block but the other way. Meaning, the flat side (the non-stamping) will be facing up. You can see it in the image below.


Next, I stamped my mug on to the flat side of the flower stamp. You have to take note that it will feel "slippery" so do not press too hard. 


And lastly, I stamp it on my paper and you will have a mirror image of your stamp. 


 As you can see below, it did not give me a perfect crisp stamped image but I can always go around it with a thin black marker/pen :)


These are two cards I've made using this technique.


Hope you've enjoyed my cards today. And don't forget to subscribe to the Lawnscaping blog and Facebook page. And also, to stop by my blog for more ideas!

Thursday, October 9, 2014

Using non-Christmas set for a Christmas Card

Hi everyone! Thanks for coming by to Lawnscaping Challenge blog. It's me, Marina, here again to share with you a new card that I've made. Last month, I used a Christmas stamp set to make a non-Christmas card, but today, I'm doing the opposite. Kind of ;)

I've taken the Sweater Weather stamp set to make a little tree. I know that my choice of colours still looks like a Fall theme card but you can turn it into a christmas card by the magic of sentiments & embellishments.


For this card, I only use 3 ink colours, Green, Red and Orange. But if you look closely, there's 2 shades of green. I've used the second-generation stamping technique to make different dimensions to the tree. It's a great way to get more out of the ink pads you already have.


I've added the red and glittery bow to make the card look Christmas-y. The sentiments are from the Winter Penguin & Sweet Christmas.


Thanks for stopping by! Let me know what you think and hope to see you again!