Showing posts with label grassy border die. Show all posts

Wednesday, February 24, 2016

Congratulations with Christy

Hello everyone, it's Christy here with another version of dino card I made previously for our Celebration Challenge. I've found that by stamping and coloring a few extra images, I can make TWO cards instead of just one, with very little extra time.


I used the super fun Critters From The Past colored with Copics, and set my scene with the Grassy and Hillside Borders, borrowing the clouds from Blue Skies. I had a mountain die that I added to the mix, but you could easily cut these out by hand. To keep my sentiment versatile, I grabbed the brand-new Ready, Set, Shake set so the card can be given for any occasion to celebrate!

I hope you enjoyed my card! You still have a few hours to play in our challenge if you haven't already. I hope to see your project there!


Wednesday, April 1, 2015

Easter Treat Bags

Hello, it's Sabine from the FIT. We are getting ready for Easter so I decided to make easy treat bags for my girls. 
I used the awesome goodie bag die, my all time favorite grassy border die, and the happy easter stamp set.


Fussy cut the bunnies and eggs


Glossy eggs, pink nose 


So now we are waiting for the Easter bunny to put some treats in there :)

Hugs, Sabine

Tuesday, March 17, 2015

Watercolor Easter Tags

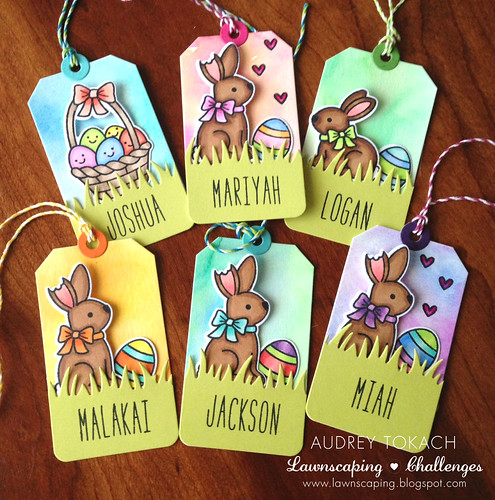
Hello there!  Audrey here!  Today I have a fun set of watercolor Easter tags to share with you!  Can you believe it's almost Easter?  Spring is on the way!

Watercolor Easter Tags


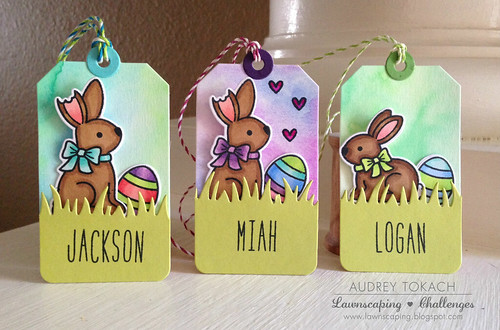
I've really been enjoying watercoloring lately.  I use several different mediums to watercolor, but these tags were painted with a cheapie watercolor palette from Michaels.  I started by diecutting several  Tag, You're It diecuts from watercolor paper, and then I painted them.  While they were drying, I stamped,  Copic colored, and cut out several images from the new Eggstra Special Easter stamp set.  I had a few colored already, but needed more for this project.  These images are so fun to color!  I used the Grassy Border die to add some grass to the bottom of each tag and then popped the images up using foam tape.  I personalized each tag using Milos ABCs.   I curled the edges of the grass slightly with my fingers, and added a hole reinforcer using coordinating card stock.  Finally, I thread each tag with different colors of Lawn Trimmings twine.  I can't wait to add these tags to Easter goodies for some of my favorite little people!

Here are a few close-ups:

Watercolor Easter Tags Watercolor Easter Tags

 I hope you enjoyed today's post!  Thanks for stopping by!

Supplies:
Stamps: Lawn Fawn Eggstra Special Easter, Milos ABCs
Dies: Lawn Fawn Eggstra Special Easter, Grassy Border, Tag You're It
Other: Watercolor paper, white and green cardstock, Lawn Trimmings twine, pan watercolors

Tuesday, September 9, 2014

PURR-fect Birthday using Goodie Bag Die

Hello everyone!  Kari here to share with you a way to embellish the awesome new Goodie Bag for a cute little birthday gift.  I also used the adorable kitty image from Spooktacular!  I adore this kitty probably as much as I do the goodie bag die!


I die cut my goodie bag out of some Mint CS from SSS, and then I trimmed down a piece of white CS to help build my scene.  I stamped my kitty images from Spooktacular, and did a little masking, so it looks like they are sitting close to each other.  I colored them in with some Copic Markers and if you happen to follow me on any social media like Instagram, you know I am a fur baby mama to two sweet kitty's Daisy and Katie, and I just had to color them similar to my babies :)  I also used some images and elements from Critter's in the Burbs, one of my all time favorite LF sets, and one of my first that I purchased.  I also die cut some Lucky Limeade CS using the Grassy Border Die.  Once I had my scene stamped, inked, die-cut and adhered, I assembled my goodie bag, and placed my focal panel onto the bag, and to finished it off, added some chevron ribbon :)


And, do I spy shimmer!?  Of course, Wink of Stella had to make an appearance as well!! *grin*


I hope I was able to give you some ideas on how to decorate your goodie bags!  If you don't have this die I HIGHLY recommend it!!  :)  
Thanks for stopping by today!!   See you all soon!

-Kari


Wednesday, April 2, 2014

My first Project Life page

Hello, it's Sabine from the Facebook Inspiration Team. I am totally excited that I get to share my first Project Life page ever finished here with you! I was not sure if it was good enough to share, but then I thought that there is no right or wrong for something as personal as a photo album. Right?! So here is my layout, I used a lot of Lawn Fawn and it was so much fun to create this.


A closeup of the title of the page using the scripty hello die and the speech bubble border die.


All the words were cut using Cole's ABCs and for the little pictures of my Louie I used the stitched journaling card die, also for the little stars.


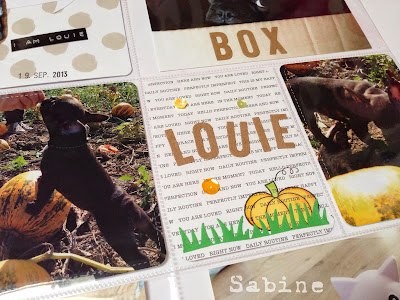
Here I stamped the pumpkin from so thankful and I used the adorable new grassy border. 

I really hope that you enjoyed a look into the first page of my Project Life album! 

Hugs, Sabine