Showing posts with label Roxanne O'Brien. Show all posts

Tuesday, February 23, 2016

Hello Baby Card

Good morning! It's Roxanne here on the blog today with a really sweet baby card that I created. I love to have cards in my stash that I can easily grab and send off when I need to instead of running to the store. Plus, a handmade card is special. Especially for someone with a new baby. They'll definitely appreciate the time and effort that you put into it! And this particular card is really simple.


I took a kraft paper base, scored it and folded to 4.25x5.5. I took the baby rattle and open heart stamp from the Lawn Fawn Hello Baby stamp set and inked them up with Memento Luxe in Wedding Dress and stamped it randomly to create a simple little background that peeks out. Fun little touch.


I then took some premium white cardstock and used the Lawn Fawn Let's Bokeh Lawn Cuts and cut out 3 circles. I inked up the larger bunny, sentiment hello baby, and the baby bunny from the set with some Memento in Tuxedo Black and stamped those into the circles I diecut. I used a Wink of Stella Brush pen to color over the sentiment and added a simple little twine bow above it. Then I colored the bunnies with my Spectrum Noir Markers (colors listed at the end). I tried using realistic coloring and shading for the bunnies especially the top bunny. I love how she came out!

For some color, I used a pretty floral piece of patterned paper from my stash and glued strips to either side of the brown and white graph paper. I rounded the two corners and adhered to my card base. I then used some foam adhesive to glue down the 3 circles in the center of that. And just for an elegant touch, I used some small self adhesive pearls on the grid lines of the graph paper.


Very simple yet soft and elegant card perfect for a new baby! I hope you're inspired to create a soft and simple card just like this. Thanks for stopping by and happy crafting.

SUPPLIES USED:

Tuesday, October 27, 2015

Happy Haunting Card

Good morning, Roxanne here today with a cute Halloween-themed card for you! I had a lot of fun creating this cute little card, so sit down and take a scroll with me through the process. I've listed all the supplies I've used at the end of this post.


My first step was to create my card base. I used a plain black cardstock that I cut, scored and folded to 4.25x5.5. I grabbed a piece of my patterned paper that I was going to adhere to the front of my card and diecut out a larger circle. I traced that diecut onto the card base so I knew where I was going to need to stamp/create my sky.

I used several star stamps from the Booyah and Party Animal sets with some Delicata in Golden Glitz and heat embossed them with clear embossing powder. I then took a sponge and my Dandelion ink pad and swirled on the hazy sky on a portion of the circle.


My next step is to stamp and create my little critters that I wanted as part of my Halloween scene. I was quite giddy when I realized that the hat and Frankenstein hair/stitches fit PERFECTLY onto the animals from the Party Animals set. I just wanted to use something cute, other than a ghost! 

I stamped these onto some quality coloring cardstock with Tuxedo Black (Memento). I masked the top hat and hair before stamping the bear onto the cardstock. I simply stamped the hat and hair image onto a sticky note, fussy cut that out carefully, and stuck that down over my stamped images of the hat and hair. This allows you to stamp over that with the bear stamp so that once the mask is lifted, it looks like it was all one image! 


Next, I colored and cut out my bears. Now as you can see, even though I'm really careful about trimming around the edges, you always end up with a very slight white edge. What I do is take a black marker (I used my Spectrum Noir True Black) and lightly go around the edge of the image so that it looks like you cut it perfectly and have clean black edges. Just a little tip I do. You'll see in the image above that I touched up the brown bear. 


Here are all my elements for my card. Let's assemble!


A little close up of the details!

I hope you liked my little Halloween card. Thanks for checking out my project! Happy crafting.


SUPPLIES USED:

Tuesday, July 28, 2015

Summer Friendship Card

Hi everyone! Roxanne here today with a step by step photo tutorial showing you how I created this fun summer friendship card using unexpected Lawn Fawn stamp sets. I love using my sets in fun ways that you may not think of pairing together. That's the beauty of creativity. So many possibilities.

LET'S GET STARTED!

I'm actually doing something totally different for me - I'm gathering my supplies BEFORE creating my card. I have an idea of what I'd like to create and then I gather the supplies and start crafting. I'm finding it's much easier (and faster) when I do this. I actually love it. I typically am a scrap as I go type person, pulling elements together while I'm in the midst of creating. But this is by far much easier. And it enables me to show you the process!

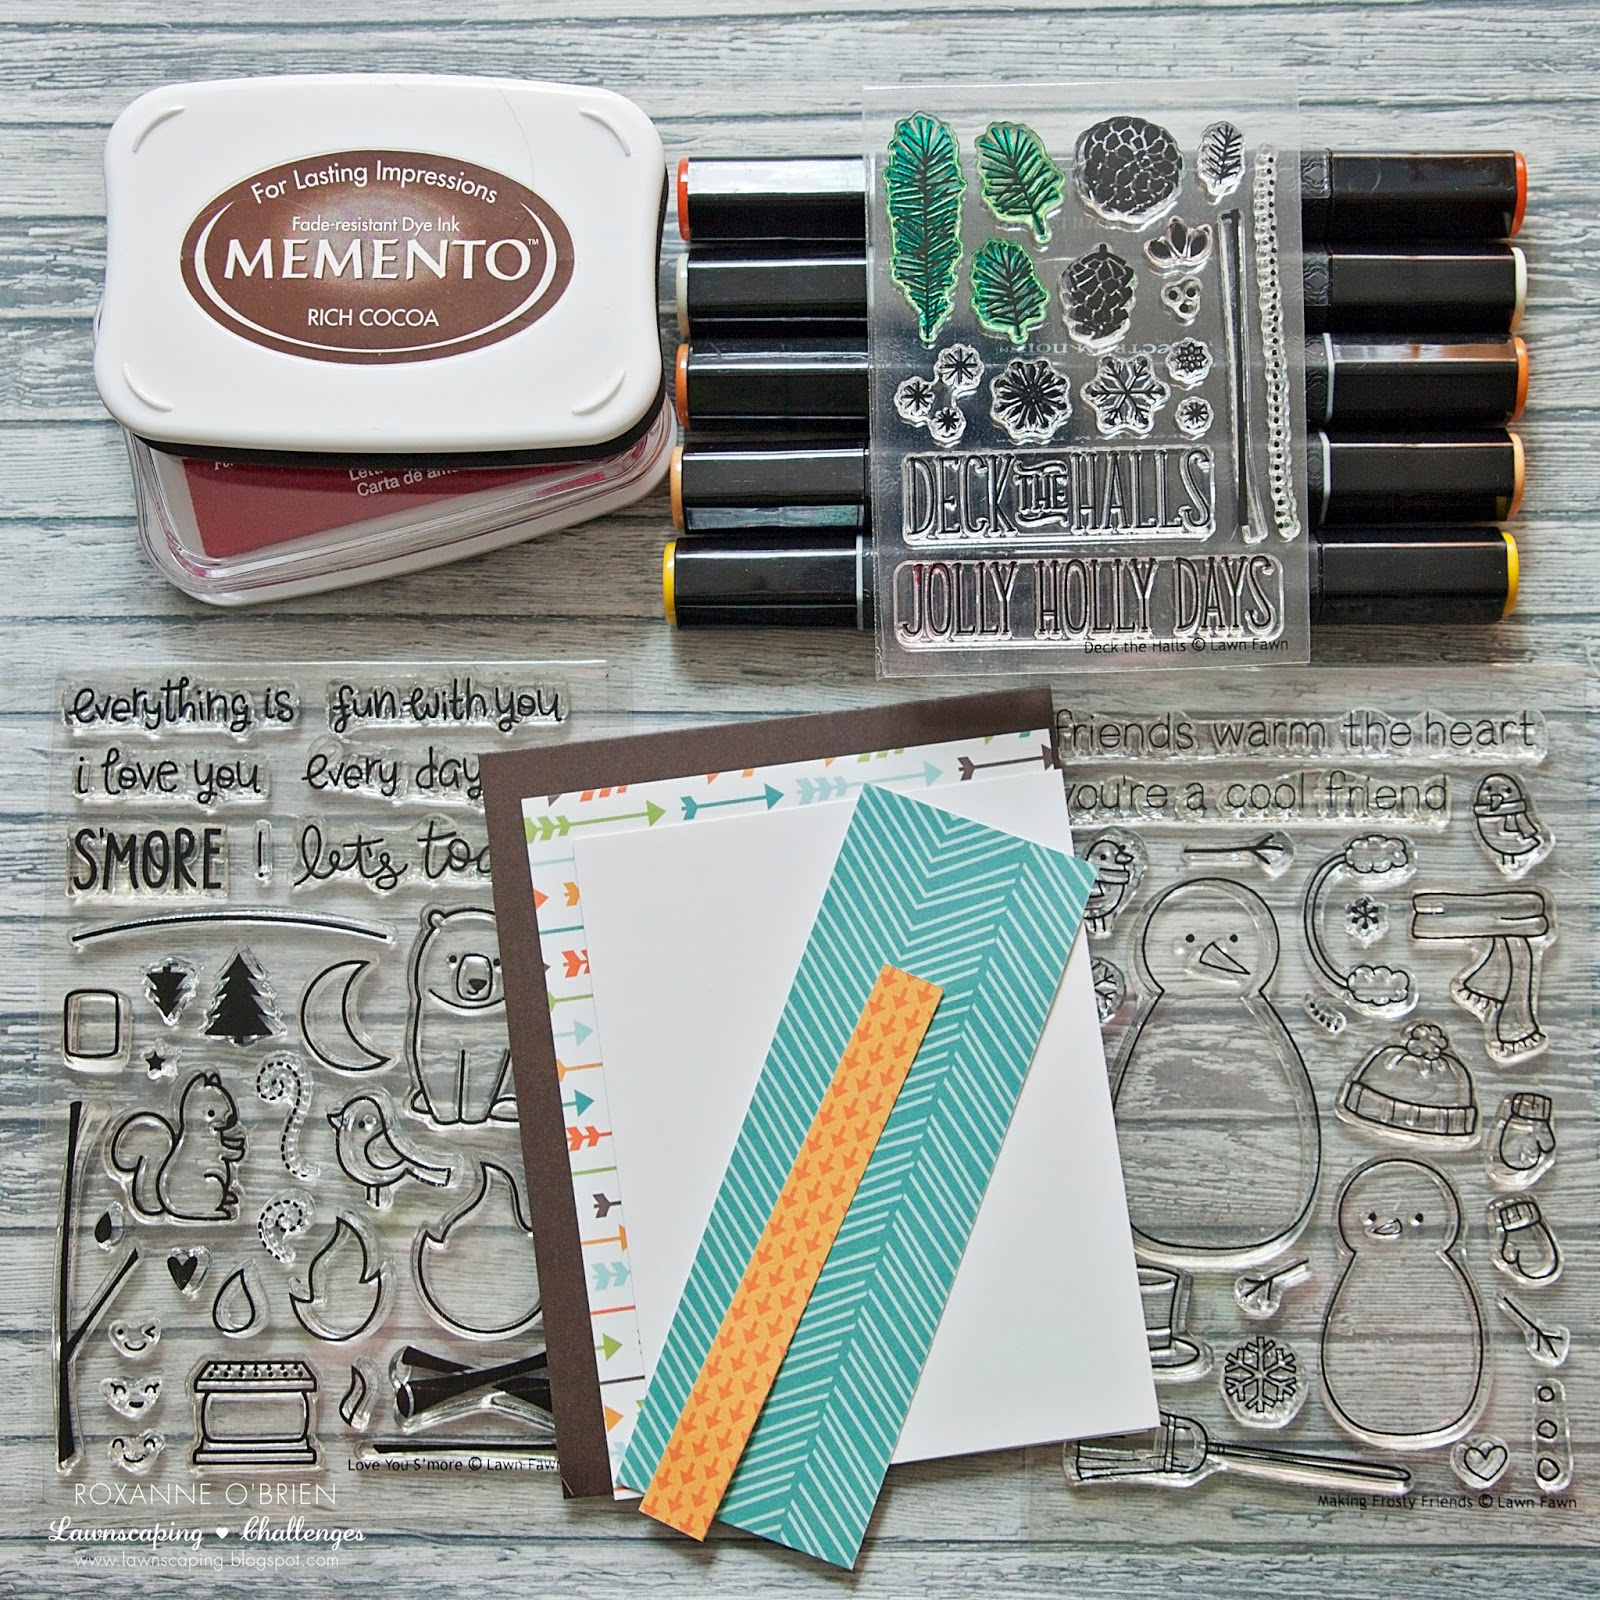
First, I gathered my supplies. Here is what I used to create this card:


I had actually trimmed everything out as well prior to starting. I cut my brown cardstock base from a piece I had in my stash (I keep pretty much every scrap!!) and scored/folded it to 4.25x5.5. I trimmed the arrow patterned paper to 4x5.25. I then cut a smaller piece of white cardstock which I was going to be stamping my scene on to. And then I simply trimmed the teal and orange patterned paper to various sizes. Nothing too specific. I hadn't really determined my final layout just yet. I did that as I went!

Next, I grabbed my piece of white cardstock and used the pine needles from the Deck the Halls set with my Pistachio ink and just stamped around the outer edges. I left a white space in the middle. I simply alternated the direction I stamped and I think it came out really cute so far!

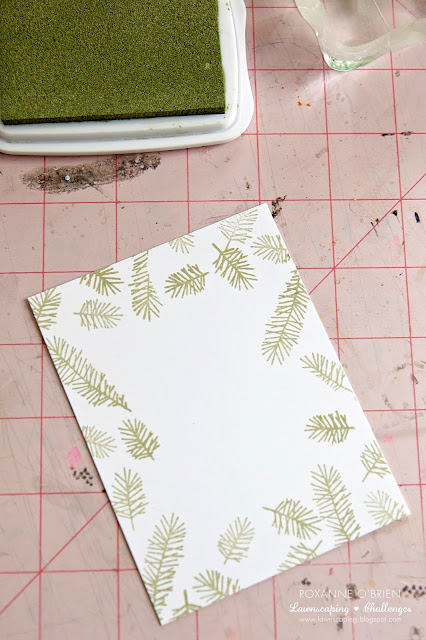
I realize my craft mat is quite, um, ugly, but it's well used and well loved! I'm sure you can relate. :) 

I took my small strip of orange/arrow paper and I stamped my sentiment for this card from the Making Frosty Friends set because it went perfectly with it! I inked that up with Memento in Rich Cocoa (I could have used the Luxe, but I grabbed my regular Memento instead because this text is a thin type font and I didn't want it to get "fat" from the juicier ink). I then stamped little red hearts next to it from the Love You S'More set, in Memento Luxe, Love Letter. Just a cute little touch. (You'll see that soon.)


In the white space I had left, I wanted to stamp in the wood from the Love You S'More set. I stamped that with my Rich Cocoa. I used Memento Luxe because it's a nice and juicy ink that really gets great coverage especially when using these solid image stamps! I stamped the wood a bit lower  because I will be adding elements above that area so I needed extra space. You'll see!


Next up, I inked up the marshmallow and fire from the Love You S'More set with my Memento in Rich Cocoa and stamped onto my white cardstock. I colored them in with my Spectrum Noir markers. I only used 5 markers total to color them in. Pretty easy peasy!


I fussy cut the fire and marshmallows out. I used foam adhesive to glue the fire to just on top of the logs I had stamped on the cardstock. It gives it a nice little bit of dimension. 


I knew I wanted to roast my marshmallows I had colored, so I inked up the branch from the Love You  S'More set and stamped that on the left side of the piece leaving enough room to add in my marshmallows to the branches. I used some foam adhesive again to give dimension.


Now after looking at my little campfire here with the toasting marshmallows, I knew I need to add the smiley face to the fire. It just makes it warmer, right? So cute!

Here is where I added in the red hearts stamped next to my sentiment. Brings in some nice color, too!


Now the fun part - ASSEMBLY! I played around with the layout a couple times before I glued anything down, but here is the final card with everything put together. 


I hope you enjoyed my little photo journey into my process of creating this card. I think this will be sweet to send to a friend that I've spent some time this summer with just to say thanks :) 

Tuesday, April 21, 2015

I'm So Thankful for You!

Good morning! Roxanne here today to show you a colorful project that I created for a Mother's Day card. I'll be making a few more for those special women in my life.

I love using bright colored images with black. It really makes your bright images pop off the page or card.

I chose a simple white base for my card. I always use a folded 4.25x5.5 card. It fits perfectly into an A2 envelope. You can get fun colored envelopes if you'd like, too! Adds a fun touch to someone's mailbox :)


I used a 4x5.25 piece of shimmering cardstock (Crafter's Companion, Silver Starlight) and a dotted stencil (Heidi Swapp) with some embossing paste (Dreamweaver Stencils, Embossing Paste). This was my first time using it and I'm definitely using this more often! It was really quite easy and fun, just took a little time to dry. After it was dry, I rubbed on some Versamagic ink in Thatched Straw just in one section. I love the look of this in person!

For the focal point, I used the Lawn Fawn Tag You're It dies to cut out the tag and hole. For the tag, I used Memento Luxe in Wedding Dress with various images from the Lawn Fawn Flutter By. I just am loving the chalkboard look lately. The hole for the tag was cut out on the yellow striped paper from the Lawn Fawn 6x6 Let's Polka Petite Paper Pack. Little touches make an impact I think.

The butterfly, rose, and leaves were stamped onto white cardstock with Memento in Tuxedo Black. I then colored them in with my Spectrum Noir Blendable Colored Pencils. I used the paper stumps and blending solution to blend my coloring. I cut them out leaving a slight white border. Using foam adhesive, I glued them to the tag I created. I love the punch of color!! The cord at the top of the tag is a little piece of cord from Lawn Fawn's Lawn Trimmings, Pink Lemonade. It matched the pink in the rose I colored.

The sentiment blocks were stamped on white cardstock with Memento in Tuxedo Black and I simply cut around them in a rectangle shape. These are from the Lawn Fawn Happy Feast set.


I used foam adhesive to glue down the tag and sentiment blocks to the embossed piece. There you go!  A beautiful Mother's Day card. I hope you're inspired to create some beautiful, and simple, cards for those special women in your life for Mother's Day :)