Showing posts with label booyah. Show all posts

Tuesday, October 25, 2016

Halloween Punny Card

It's almost my favorite time of year...HALLOWEEN!!!! I enjoy this holiday sooooo much. It's so much fun, it's in my favorite season, my favorite scents and flavors are surrounding me. Ahhhhh. So I wanted to make a funny card to send to someone to make them laugh. I must admit, I was laughing the entire time I made this. Seriously, it doesn't take much to amuse me! ;)


Are you ready?! 

Don't wet your plants...


Are you dying yet?!?!?!  


I mean, the ghost himself is laughing. I couldn't help myself with this one.


Just one more time because it's THAT funny.


HA! I hope you laughed like I did, or at least smiled. ;) Happy Halloween!!!!

PRODUCTS USED:
  • Lawn Fawn Sweet Smiles
  • Lawn Fawn Pizza My Heart
  • Lawn Fawn Booyah
  • Lawn Fawn Milo's ABCs
  • Memento, Tuxedo Black
  • Versafine, Onyx Black
  • Spectrum Noir Alcohol Markers
  • Crafter's Companion Ultra Smooth Premium White Cardstock


Tuesday, October 27, 2015

Happy Haunting Card

Good morning, Roxanne here today with a cute Halloween-themed card for you! I had a lot of fun creating this cute little card, so sit down and take a scroll with me through the process. I've listed all the supplies I've used at the end of this post.


My first step was to create my card base. I used a plain black cardstock that I cut, scored and folded to 4.25x5.5. I grabbed a piece of my patterned paper that I was going to adhere to the front of my card and diecut out a larger circle. I traced that diecut onto the card base so I knew where I was going to need to stamp/create my sky.

I used several star stamps from the Booyah and Party Animal sets with some Delicata in Golden Glitz and heat embossed them with clear embossing powder. I then took a sponge and my Dandelion ink pad and swirled on the hazy sky on a portion of the circle.


My next step is to stamp and create my little critters that I wanted as part of my Halloween scene. I was quite giddy when I realized that the hat and Frankenstein hair/stitches fit PERFECTLY onto the animals from the Party Animals set. I just wanted to use something cute, other than a ghost! 

I stamped these onto some quality coloring cardstock with Tuxedo Black (Memento). I masked the top hat and hair before stamping the bear onto the cardstock. I simply stamped the hat and hair image onto a sticky note, fussy cut that out carefully, and stuck that down over my stamped images of the hat and hair. This allows you to stamp over that with the bear stamp so that once the mask is lifted, it looks like it was all one image! 


Next, I colored and cut out my bears. Now as you can see, even though I'm really careful about trimming around the edges, you always end up with a very slight white edge. What I do is take a black marker (I used my Spectrum Noir True Black) and lightly go around the edge of the image so that it looks like you cut it perfectly and have clean black edges. Just a little tip I do. You'll see in the image above that I touched up the brown bear. 


Here are all my elements for my card. Let's assemble!


A little close up of the details!

I hope you liked my little Halloween card. Thanks for checking out my project! Happy crafting.


SUPPLIES USED:

Tuesday, September 15, 2015

Halloween Tags with Audrey!

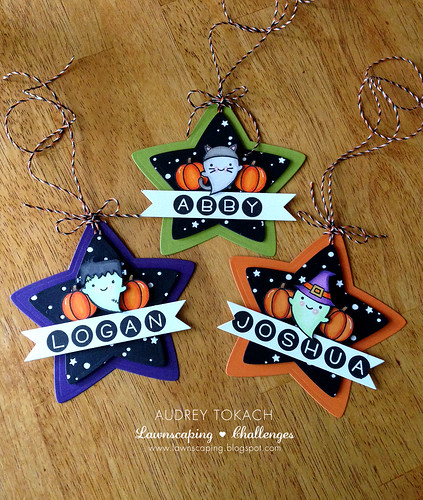
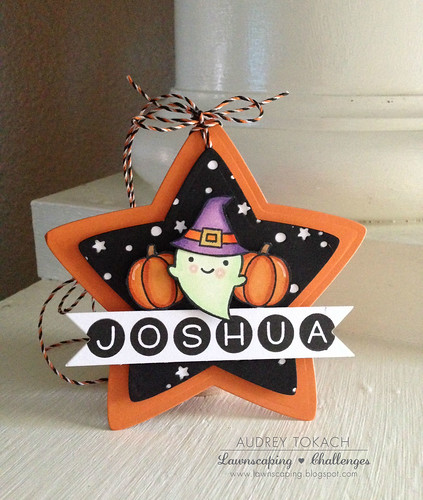
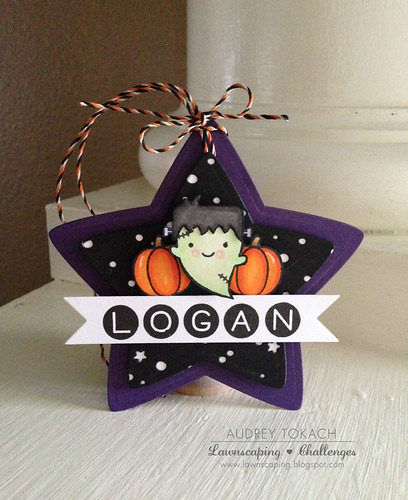
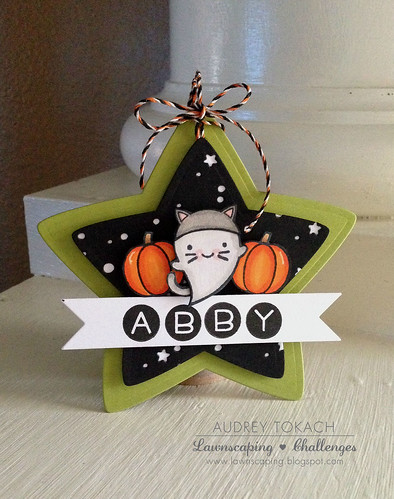
Hi there!  Audrey here today with a fun set of Halloween tags using a bunch of goodies from the new release!  I  have a bunch of kiddos in my life that get special halloween treats, and I like to dress them up with handmade tags.  Here are a few that I created using the new Booyah stamp set!  I just love these little ghosts!  Keep reading to see how I made them, and for close up photos of each.

Halloween Tags


I started off by diecutting the largest star in the Puffy Star Stackables die set out of halloween colors of cardstock.  Then, using the second largest star in the set, I diecut both a black star and a white star...


Halloween Tags


I put the black star face down on the Snowy Backdrops die to cut the pattern into the black star, and then I glued the white star directly behind it to show off those cute tiny stars and circles!  I stamped, colored and fussy cut several little ghosts and accessories from the Booyah stamp set, and then stamped colored and fussy cut the largest pumpkins from the Happy Harvest stamp set - 2 for each tag.


Halloween Tags


Then, using Owen's ABCs and a banner die from my stash, I personalized each tag using black ink.  I punched a tiny hole in each of the large colored stars and threaded some Spooky Lawn trimmings through and tied a bow.  Then, I adhered the black and white star to the larger one with foam tape, along with the ghosts, pumpkins and banners, all with you guessed it, foam tape.  The ghosts are on two layers of tape so that they stand out above everything else.  I added some white gel pen accents and wink of stella glitter pen, too.


Halloween Tags

That's all for me today... I hope you are inspired to create some halloween tags of your own!  Thanks for stopping by! :)

Supplies:
Stamps: Lawn Fawn Booyah, Happy Harvest, Owen's ABCs
Dies: Lawn Fawn Snowy Backdrops, Puffy Star Stackables
Paper: PTI White, True Black, Orange Zest, Royal Velvet, Simply Chartruese
Other: Lawn  Fawn Spooky Lawn Trimmings, white gel pen, wink of stella clear glitter brush pen, foam tape