Showing posts with label Hello Baby. Show all posts

Tuesday, February 23, 2016

Hello Baby Card

Good morning! It's Roxanne here on the blog today with a really sweet baby card that I created. I love to have cards in my stash that I can easily grab and send off when I need to instead of running to the store. Plus, a handmade card is special. Especially for someone with a new baby. They'll definitely appreciate the time and effort that you put into it! And this particular card is really simple.


I took a kraft paper base, scored it and folded to 4.25x5.5. I took the baby rattle and open heart stamp from the Lawn Fawn Hello Baby stamp set and inked them up with Memento Luxe in Wedding Dress and stamped it randomly to create a simple little background that peeks out. Fun little touch.


I then took some premium white cardstock and used the Lawn Fawn Let's Bokeh Lawn Cuts and cut out 3 circles. I inked up the larger bunny, sentiment hello baby, and the baby bunny from the set with some Memento in Tuxedo Black and stamped those into the circles I diecut. I used a Wink of Stella Brush pen to color over the sentiment and added a simple little twine bow above it. Then I colored the bunnies with my Spectrum Noir Markers (colors listed at the end). I tried using realistic coloring and shading for the bunnies especially the top bunny. I love how she came out!

For some color, I used a pretty floral piece of patterned paper from my stash and glued strips to either side of the brown and white graph paper. I rounded the two corners and adhered to my card base. I then used some foam adhesive to glue down the 3 circles in the center of that. And just for an elegant touch, I used some small self adhesive pearls on the grid lines of the graph paper.


Very simple yet soft and elegant card perfect for a new baby! I hope you're inspired to create a soft and simple card just like this. Thanks for stopping by and happy crafting.

SUPPLIES USED:

Tuesday, June 23, 2015

Rainy Day Hello Card

Good morning! Roxanne here with a card that I thought was fitting for the rain we've been having here in Chicago. Seems to have rained quite a bit so far this spring/beginning of summer. I decided to make a bright little card today that is inspired by the rain.

I recently bought this Lawn Fawn, Hello Baby set and I have been wanting to use it. I also wanted the main image to really be the only thing in color, so it really stands out.

I went with a white card base, scored and folded to 4.25x5.5. Then I cut two smaller panels, both 4x5.25. I glued one down to the base. The other, I used an embossing folder with little dots on it and ran that through my machine. I then took a die I have in my supplies and die cut out the shape in the center of the card. For this panel, I did use a watercolor cardstock for texture and because I was going to be coloring in my little scene with my watercolor markers.


With the diecut piece, I started with my little scene. First, I stamped the duck from the Lawn Fawn Hello Baby set. I then stamped that again on a sticky note to create my mask. I cut out around that from the sticky note and stuck it over my stamped image on the watercolor cardstock. This will allow you to stamp over that and create a fun look that makes it look like he's holding the umbrella. I next stamped the umbrella and then the grass below his feet. For the grass, I just used the grass image from the Hello Baby set with some Memento Luxe in Pistachio and stamped that randomly to make it look like he's standing in the tall grass in a field.

I colored in my little ducky with my Spectrum Aqua markers (colors listed at the end), and the umbrella as well.

I made another mask with the umbrella and clouds by using the same sticky note technique above. This way, you can layer stamped images and it allows you to give so much dimension to your scenes! I used the mask for the clouds for the rain as well. I used the triple dotted lined image from the same set and stamped that with Memento ink in Summer Sky (how appropriate!) to give it some movement. I added several sequins from Lawn Trimmings I had on hand.

Next, I actually adhered the embossed panel down first over the plain panel I had glued down previously to line them up. I used a thick foam circle adhesive for this to pop it further off the card. For the stamped/colored scene, I used a thinner foam circle adhesive to give it a tiny bit of pop, but to leave room between that and the embossed panel I stuck down. I just then snuck that into the opening and pressed down to adhere.

In my stash, I had this little Basic Grey chipboard tag and stamped the hello from that same set in Memento in Tuxedo Black. I tied a simple bow around the end of the tag with some Lawn Trimmings cord, and then glued that down underneath the diecut panel.

I just love all the white and pop of color in the center from my little stamped scene. I hope you enjoyed my project today! Thanks for stopping by. :)


Supplies:
Lawn Fawn Hello Baby!
Lawn Fawn Lawn Trimmings - Triple Cord, Natural  and Fall Sequins
Memento, Tuxedo Black & Summer Sky
Memento Luxe, Pistachio
Basic Grey Chipboard Elements, Hey You Collection
Cuttlebug Embossing A2 Folder, Swiss Dots
Spectrum Noir Watercolour Cardstock
Spectrum Aqua Markers - Kingfisher, Charcoal (clouds); Sunflower, Sunset, Jasmine (duck); Red Violet, Sea Green (umbrella); Moss (grass)
Papertrey Ink - Mat Stack 3 Die

Monday, June 22, 2015

"Double the love" Baby Card

Hi everyone! It's Yuki here with my final post on the Lawnscaping blog. I've had so much fun being part of the Facebook Inspiration Team and I can't believe how quickly the term flew by! I hope you've enjoyed my creations and thank you so much for all of the sweet comments and support!

For today's post I made a sweet baby card for my boss. She is expecting twins - a boy and a girl! I decided to use the adorable images from the "Hello Baby" set to create a cute little scene.

"Double the Love" Baby Card by Handmade by Yuki | "Hello Baby" by Lawn Fawn

I used the largest of the small stitched rectangle dies to cut my background using pattern paper from the "Pint-sized Patterns: Beachside" 6x6 paper pack. I used two stitched square stackables to cut a window from the background and to cut a frame from white cardstock. I stamped the clouds directly onto the square background and colored the sky using "Tumbled Glass" distress ink. I die cut a separate square from white cardstock and colored the grass using Hero Arts "Green Hills" dye ink. I cut two layers of grass using the "Grassy Border" die.

Although the "Hello Baby" set does include a sentiment for twins, I decided to make a custom sentiment using the "Scripty Love" die and "Harold's ABCs." I die cut the love die three times from white cardstock. I then white heat embossed the "double the" onto a strip of vellum. To finish the card, I stamped the "congratulations" sentiment from "Penelope's Blossoms" on the inside of the card.

 photo HandmadebyYuki_Double the Love Inside.jpg

I just love how this card turned out and I hope my boss likes it too! I hope you were inspired by today's post and thanks again for stopping by! Be sure to visit the Lawnscaping Challenges Facebook page for even more amazing inspiration and visit my blog for a full list of supplies used to create today’s card. Don't forget to check out the latest Lawnscaping Challenge: Stars and Stripes, you have until Wednesday to play along! ♥

Monday, December 22, 2014

2015 Desktop Calendar

Hi everyone! It's Yuki here with my first blog post on the Lawnscaping blog :). One of my favorite things about the end of the year is buying new calendars for the following year. This year instead of buying a calendar, I decided to make my own desktop calendar to give as a gift.


I reused an old CD calendar case I had from a previous year as my calendar stand. For the dates, I used a calendar stamp set I had purchased specifically with this project in mind. However, you could also use calendar stickers, printables or even write the dates by hand. I found the stamp to be the most versatile and convenient since you can stamp it in different colors and even heat emboss it. I decided to make each month unique and tried to  highlight key dates such as holidays and even my friend's birthday.

Since I used a TON of different products (too many to list), I listed the Lawn Fawn products used for each month under the photo captions.

Winter Penguin; Yeti, Set, Go.

Science of Love, #awesome

Critters in the Forest, Hats Off To You, Grassy Border

Hello Baby, Milo's ABCs, Hello Sunshine

Critters at the Dog Park, Sweater Weather, Stitched Hillside Borders

Critters in the Burbs, Grassy Border

Life is Good, Let's Polka

Critters on the Savanna, Grassy Border

Into the Woods, Sweater Weather

Spooktacular, Stitched Hillside Borders, Forest Border

Finley's ABCs, Stitched Leaves, Violet's ABCs

Critters in the Arctic, Hats Off To You, Stitched Hillside Borders

Yay you made it to the end of the post! I know that was a lot of scrolling LOL, however I hope you enjoyed today's post. Although this project was a little more time consuming than most and did require some extra planning, it was super fun to make and I'm really happy with the end result. I hope my friend likes her handmade gift as much as I do!

Thanks again for stopping by and be sure to visit the Lawnscaping Challenges Facebook page for even more awesome inspiration. And also, don't forget to check out the latest Lawnscaping Challenge: Merry Christmas, you have until Wednesday to play along!

Happy Holidays! ♥


Saturday, July 5, 2014

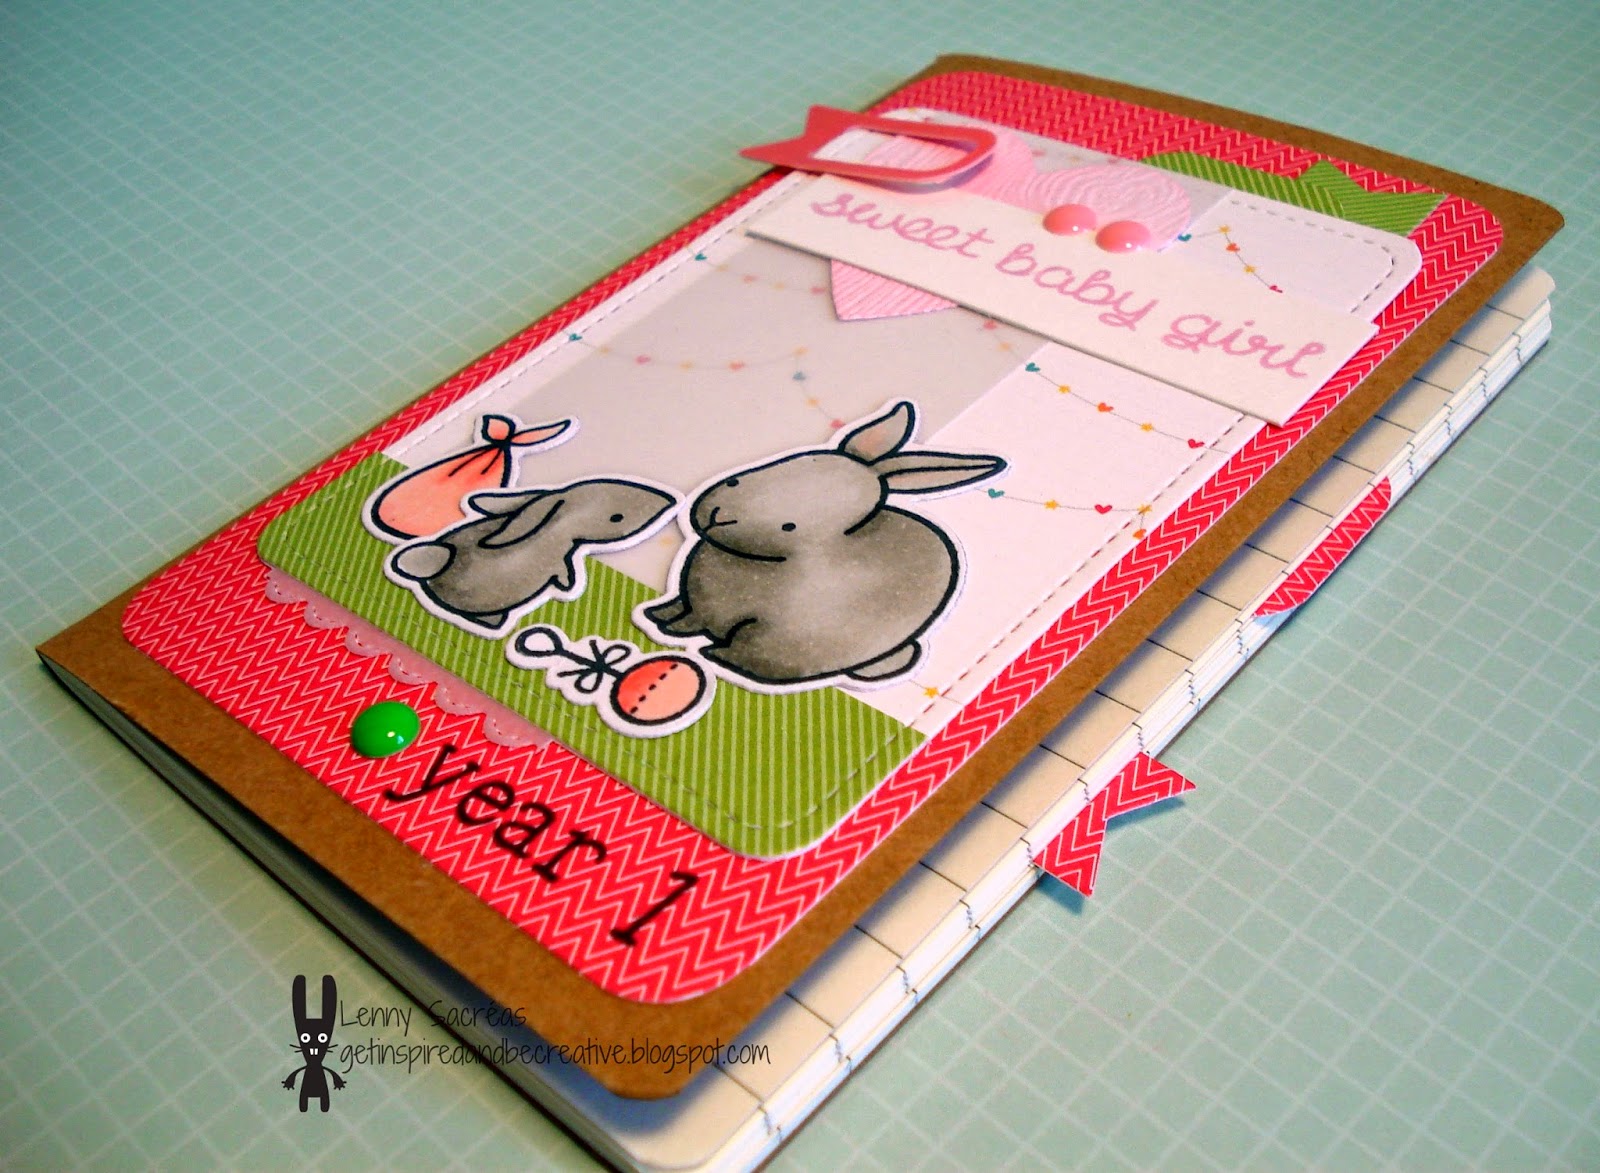
Sweet baby girl's first year ... little notebook!

Hi friends!! 

Happy Saturday!! I hope you all had a great 4th of July!!

It's Lenny from the Facebook Inspiration Team here with you today!

I would like to share an altered mini notebook ... "Sweet baby girl"!
It's a "year one" kinda notebook ... to write down all the fun little stuff of
that first year!
I used my new Lawn Fawn "Hello baby" stamp set and dies. 
I also used an older one: "Smitty's ABC's" and some "Hello sunshine" papers.


For a detailed list of supplies: click here!! 

And ... stay tuned ... there'll be a new fun challenge on Monday!!
I hope you'll join us in the fun and play along!!

hugs . . .

lenny