Showing posts with label making frosty friends. Show all posts

Tuesday, September 27, 2016

Accio Bookmarks

Good morning, everyone! I can never resist anything related to Harry Potter. So when I tried thinking of a fun project to share with you all this month, I naturally put on my sorting hat and got to getting creative.

My oldest wanted some bookmarks, and I obliged by making a set of Harry Potter inspired ones for him. It's pretty fitting since we are finally on Half Blood Prince. It's great to reread those books with him because I get to relive it. And I'm trying reallllly hard to get my youngest interested so I can eventually read them to him as well.

I used a lot of different sets for these which is the fun part. I mean, just imagine all the uses each of these sets have seen from everyone using them! I've listed all the supplies I've used at the bottom to create these. They are double sided in case you're wondering. Each of the bookmarks are 2"x6" for those wanting to make some of your own. These would also be fab stocking stuffers or sent with a gift of a book for someone using whatever they're interested in as the theme. I already have ideas for more!


ACCIO BOOKMARKS!


Here they all are:
1. Quidditch brooms and a golden snitch
2. Gryffindor scarf and Harry's little face complete with lightning bolt scar
3. Mandrakes and earmuffs
4. Hedwig wearing Gryffindor colors on her scarf and letters


I hope you enjoyed my project today and you're inspired to take a good look at your stamps and create something for yourself, or a loved one, teacher, daycare provider, or whoever would love a custom set of fun bookmarks themed with something they adore. Thanks for checking them out! 

PRODUCTS USED:
  • Lawn Fawn Baaah Humbug
  • Lawn Fawn Winter Owl
  • Lawn Fawn Sweet Smiles
  • Lawn Fawn Making Frosty Friends
  • Lawn Fawn Dream
  • Lawn Fawn Let's Bokeh Lawn Cuts
  • Lawn Fawn Bugs & Kisses
  • Lawn Fawn Trim the Tree
  • Lawn Fawn Happy Trails
  • Lawn Fawn You've Got Mail
  • Spectrum Aqua Markers
  • Spectrum Aqua Watercolor Cardstock
  • Spectrum Sparkle Pens
  • Memento Luxe, Rich Cocoa
  • Versafine, Onyx Black


Wednesday, November 4, 2015

You're A Cool Friend

Hello! 

It's Angel here to share with you a fun winter card! It's so hard to pick just one stamp set to use from Lawn Fawn so in this case I use quite a few. 


Eek! How cute is that reindeer and snowman! I think that in a Lawn Fawn world they could be friends. I love how all of the sets match well with each other. 

I die cut the smaller banner from the Stitched Party Banners die set using patterned paper from the Bokeh in the Snow 6x6 paper pad. Next I used a piece of white card stock and die cut the small banner die again along with one of the Hillside Border dies. I stamped the reindeer from Toboggan Together along with the snowman and accessories from Making Frosty Friends using Memento Tuxedo Black ink and colored them using my Copic Markers. 


I did a little stamp surgery on the sentiment so I could stamp it where I wanted. I added a few details to the scarf with my white gel pen and glitter to the hat using my Wink of Stella clear brush marker. 

I adhered everything to a standard top folding card and attached a piece of Red Sparkle hemp cord and tied in to a bow. 

Thanks for stopping by today! All products used are listed and linked below. Have a great day!

Angel


Tuesday, October 20, 2015

Let it Snow with Audrey

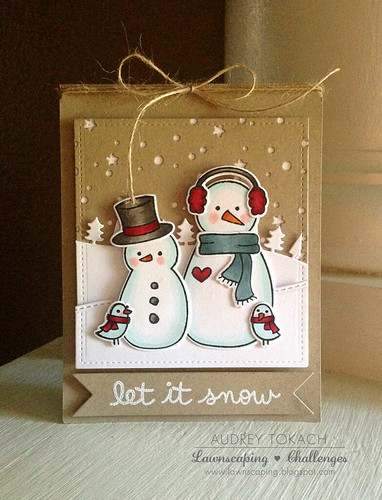
Hi there!  Audrey here with a rustic winter card to share with you!  I love kraft cardstock for winter cards because it really shows off the snow!   I started off using the Small Stitched Rectangles dies and cut the largest rectangle in the set from both kraft and white cardstock.  Then, I used the Snowy Backdrops die to add snow to the kraft rectangle diecut, and backed it with the white rectangle diecut.  The rectangles were a bit longer than I wanted, so I trimmed about an inch off of the bottom, and used the Stitched Hillside Borders die and Forest Border die to create a ground for my little snowman to stand on.  I stamped, colored and diecut the snowmen, their accessories, and the little birds from the Making Frosty Friends stamp set and then popped them up on the hills with some foam tape. I also adhered the panel up on a kraft card base with more foam tape. I stamped a sentiment from the Snowy Backdrops stamp set onto a strip of kraft cardstock using Versamark ink, and then heat embossed it with white embossing powder.  Then I hand cut flag ends on the banner, and popped it up with, you guessed it... foam tape.  I finished the card off with a bow using some jute twine.

Let it Snow

I hope you like it!  Thanks so much for stopping by! :)

Tuesday, July 28, 2015

Summer Friendship Card

Hi everyone! Roxanne here today with a step by step photo tutorial showing you how I created this fun summer friendship card using unexpected Lawn Fawn stamp sets. I love using my sets in fun ways that you may not think of pairing together. That's the beauty of creativity. So many possibilities.

LET'S GET STARTED!

I'm actually doing something totally different for me - I'm gathering my supplies BEFORE creating my card. I have an idea of what I'd like to create and then I gather the supplies and start crafting. I'm finding it's much easier (and faster) when I do this. I actually love it. I typically am a scrap as I go type person, pulling elements together while I'm in the midst of creating. But this is by far much easier. And it enables me to show you the process!

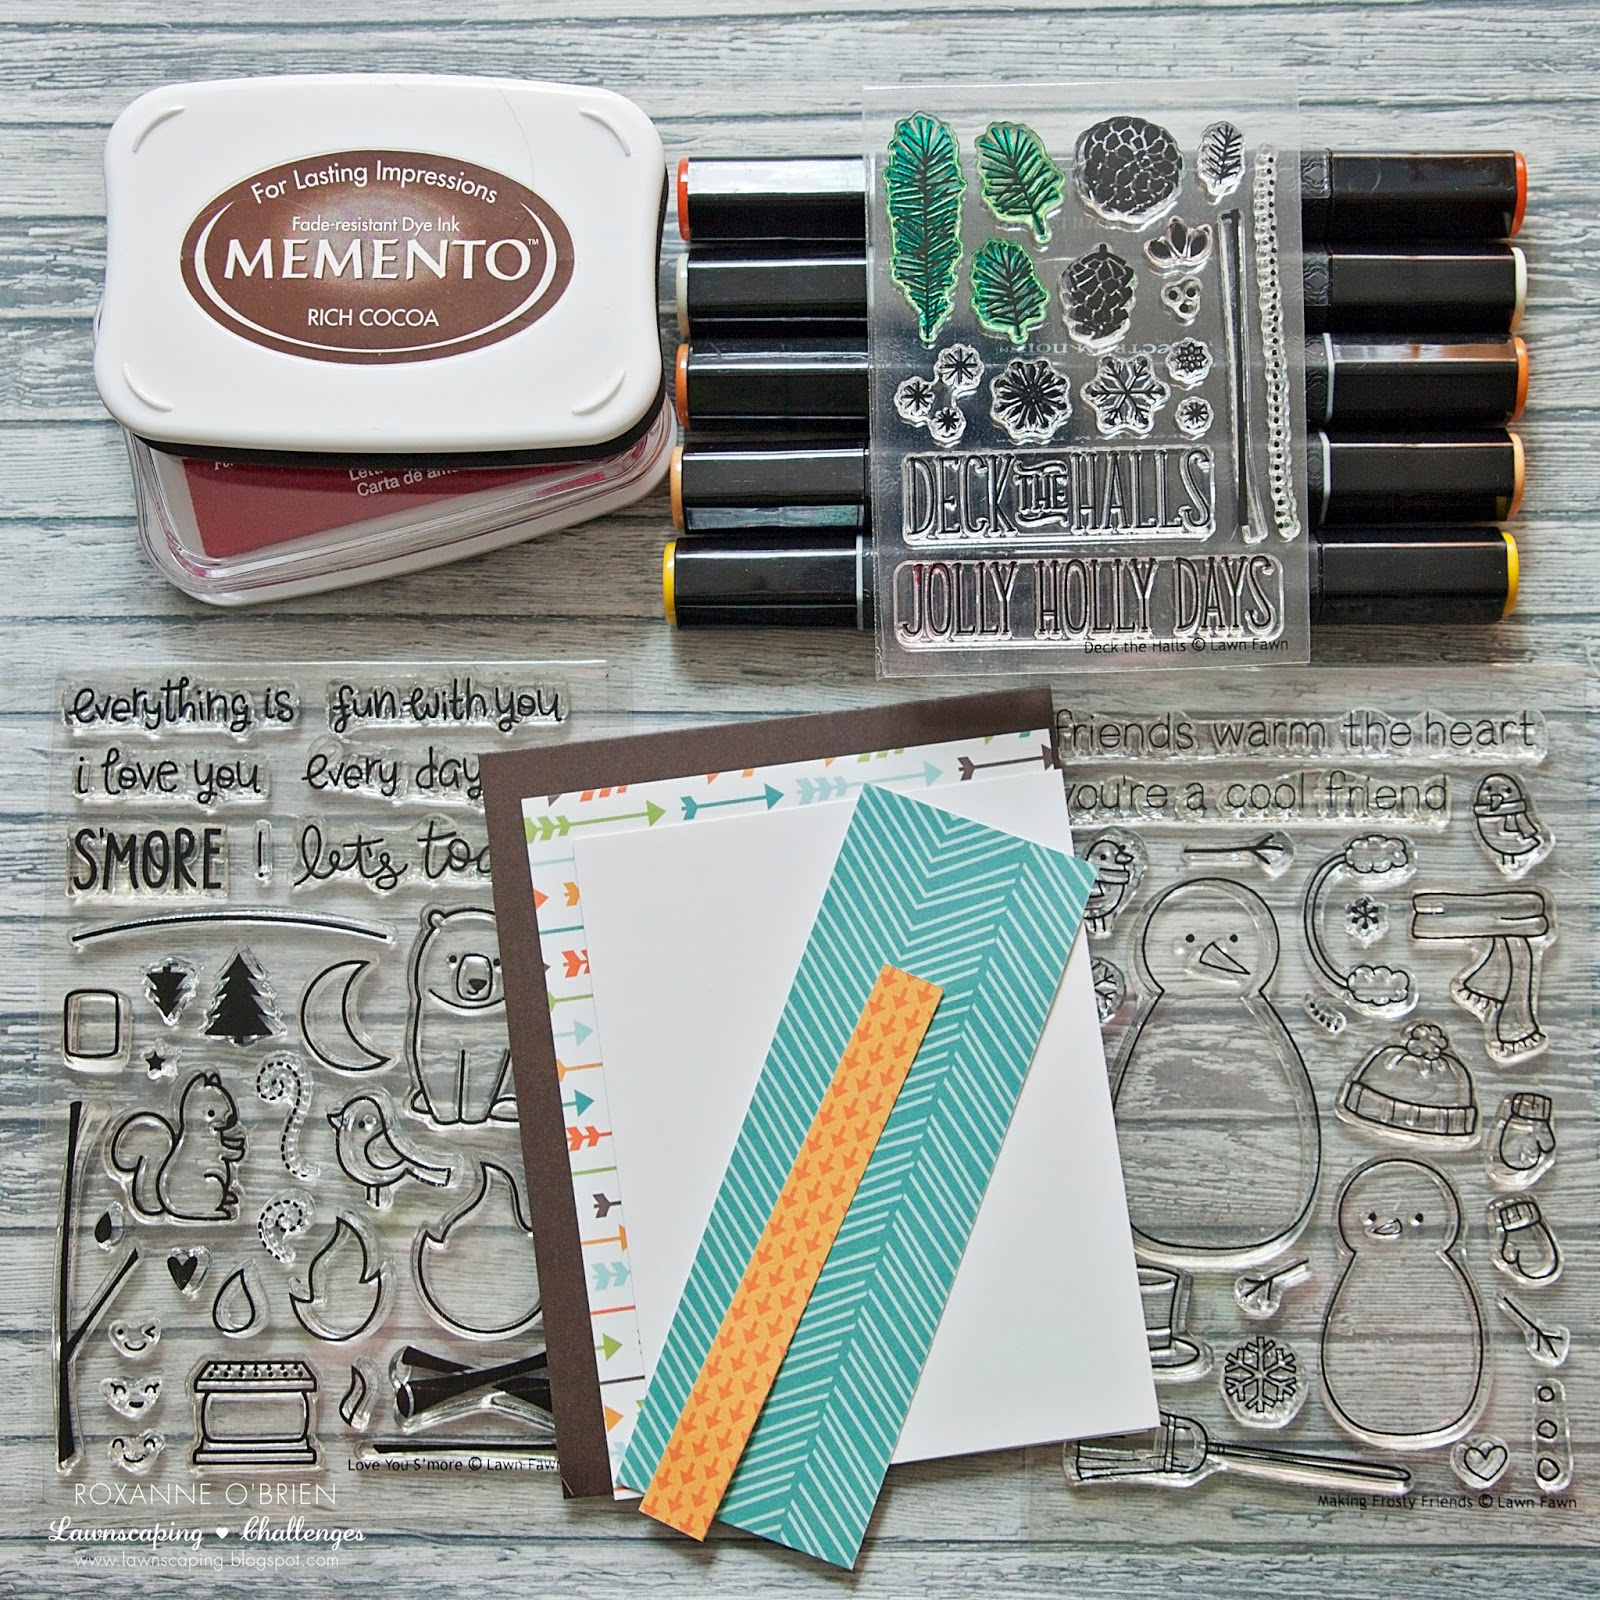
First, I gathered my supplies. Here is what I used to create this card:


I had actually trimmed everything out as well prior to starting. I cut my brown cardstock base from a piece I had in my stash (I keep pretty much every scrap!!) and scored/folded it to 4.25x5.5. I trimmed the arrow patterned paper to 4x5.25. I then cut a smaller piece of white cardstock which I was going to be stamping my scene on to. And then I simply trimmed the teal and orange patterned paper to various sizes. Nothing too specific. I hadn't really determined my final layout just yet. I did that as I went!

Next, I grabbed my piece of white cardstock and used the pine needles from the Deck the Halls set with my Pistachio ink and just stamped around the outer edges. I left a white space in the middle. I simply alternated the direction I stamped and I think it came out really cute so far!

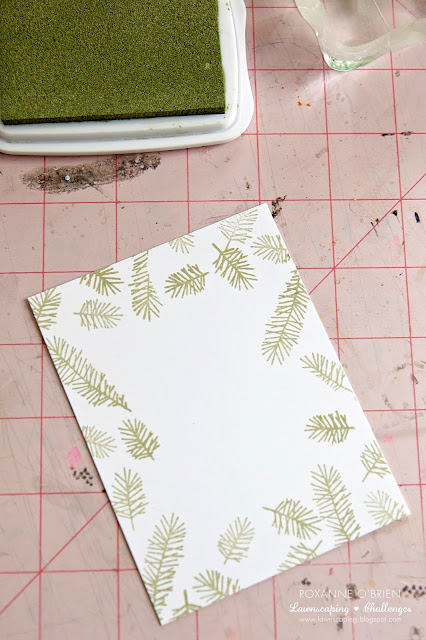
I realize my craft mat is quite, um, ugly, but it's well used and well loved! I'm sure you can relate. :) 

I took my small strip of orange/arrow paper and I stamped my sentiment for this card from the Making Frosty Friends set because it went perfectly with it! I inked that up with Memento in Rich Cocoa (I could have used the Luxe, but I grabbed my regular Memento instead because this text is a thin type font and I didn't want it to get "fat" from the juicier ink). I then stamped little red hearts next to it from the Love You S'More set, in Memento Luxe, Love Letter. Just a cute little touch. (You'll see that soon.)


In the white space I had left, I wanted to stamp in the wood from the Love You S'More set. I stamped that with my Rich Cocoa. I used Memento Luxe because it's a nice and juicy ink that really gets great coverage especially when using these solid image stamps! I stamped the wood a bit lower  because I will be adding elements above that area so I needed extra space. You'll see!


Next up, I inked up the marshmallow and fire from the Love You S'More set with my Memento in Rich Cocoa and stamped onto my white cardstock. I colored them in with my Spectrum Noir markers. I only used 5 markers total to color them in. Pretty easy peasy!


I fussy cut the fire and marshmallows out. I used foam adhesive to glue the fire to just on top of the logs I had stamped on the cardstock. It gives it a nice little bit of dimension. 


I knew I wanted to roast my marshmallows I had colored, so I inked up the branch from the Love You  S'More set and stamped that on the left side of the piece leaving enough room to add in my marshmallows to the branches. I used some foam adhesive again to give dimension.


Now after looking at my little campfire here with the toasting marshmallows, I knew I need to add the smiley face to the fire. It just makes it warmer, right? So cute!

Here is where I added in the red hearts stamped next to my sentiment. Brings in some nice color, too!


Now the fun part - ASSEMBLY! I played around with the layout a couple times before I glued anything down, but here is the final card with everything put together. 


I hope you enjoyed my little photo journey into my process of creating this card. I think this will be sweet to send to a friend that I've spent some time this summer with just to say thanks :)