Showing posts with label Lawnscaping Inspiration Team. Show all posts

Friday, July 31, 2015

FIT blog hop ... Deep red!!

Hi friends!!

It's Lenny from the FIT here with you today!! 
Friday ... last Friday of the month ... you know what that means on the Lawnscaping blog!!
Blog hop time, of course!! 
This month we're inspired by: "deep red". 


Some Pinterest inspiration to get you in the mood ... 


This fun blog hops is sponsored by the Ink Road!!
You can win a $25 gift certificate to this fun store!!
wohoo!! How fun is that?!?

All you have to do ... leave a comment on each blog of this hop!!
And ... don't forget to include your e-mail addy somewhere,
so we can reach you when you're the winner!! 


Blog hop order:

Lawnscaping blog (you are here) :) 


Have fun hopping!!! 
Don't forget to leave a comment and your e-mail address!!! Good luck!!
Happy weekend and stay tuned for another fab Lawnscaping challenge on Monday! 

bye ... 

lenny

Tuesday, March 10, 2015

Happy 5th Birthday Lawn Fawn!!

Hi all!! Kari back with you from the FB Inspiration Team and I am excited about this post as it is a special one.  Today is a celebration of Lawn Fawn!  Lawn Fawn is the reason why we have this challenge blog, because we love the company and everything about it!  For me personally, I started stamping and creating cards right about the same time Lawn Fawn came about, so it is my tried and true stamp company!  They have come a long way, and have provided us as crafter's with some awesome products to use for our creativity!  They started out with just stamps - and now they have pretty much anything you need for your projects - from stamps, to paper, to dies, to twine, to embellishments, and they just introduced their own line of ink!

So - I wanted to make a special birthday card to celebrate their 5 years!!


I used some new products and some older which is only fitting I think.  I started out by creating the embossed background and embossed it in gold embossing powder.  I then die cut from the Party Balloons die set, the heart from New Leaf card stock, and I also die cut the number "5" from Quinn's 123 die set from Audrey Blue card stock.  I also stamped the coordinating stamp onto the die cut and embossed it as well in gold.  I also die cut one of the strings from the Party Balloons die set True Black card stock.  I set those pieces aside.  I stamped the microphone from "Stay Tuned" in Lawn Fawn Black Licorice ink.  I fussy cut the microphone out ( which I normally don't like to do ) and I wanted to wrap the balloon string around the bottom.  I did a little more stamping on my main panel using some more of the new Lawn Fawn Inks in Cranberry, Fake Tan, Sunflower, Freshly Cut Grass, and Mermaid and I stamped the music notes also from Stay Tuned.  For my sentiment, I used the Happy Birthday from the stamp set #Awesome, and the "To" and the "You" from Thank You Tags. For a final touch I added some wink of stella to the microphone for some shimmer.  I had to be careful with it though, b/c I noticed that I had smudged the black ink a bit, which surprised me a little since this is a fast drying ink...it must be the card stock I was using.  
I put all my elements together, and placed them onto a 5 inch square card.


Happy Birthday Lawn Fawn!!!!!  Here's to many more years of happiness with awesome creativity!

See you all soon!
Kari


Thursday, November 13, 2014

Two Cards Using Mirror Stamping

Hi everyone! Thanks for coming by to Lawnscaping Challenge blog. It's me, Marina, here again to share with you not one but two cards :) I am a huge fan of stretch my stamps and I have shown you how you can turn your christmas stamp set to a non-christmas card, vice versa. Today, I'm going to show you how you can stretch the image in your stamp set.

I'm featuring the cutest cup in the Love You a Latte stamp set by Lawn Fawn. I will show you how to make a mirror image of out the cup so that it's facing each other.

First, you have, of course, choose the stamp image that you want to "mirror" then choose another stamp that is bigger than your choice of image. I used this flower image. I stuck my flower image to my block but the other way. Meaning, the flat side (the non-stamping) will be facing up. You can see it in the image below.


Next, I stamped my mug on to the flat side of the flower stamp. You have to take note that it will feel "slippery" so do not press too hard. 


And lastly, I stamp it on my paper and you will have a mirror image of your stamp. 


 As you can see below, it did not give me a perfect crisp stamped image but I can always go around it with a thin black marker/pen :)


These are two cards I've made using this technique.


Hope you've enjoyed my cards today. And don't forget to subscribe to the Lawnscaping blog and Facebook page. And also, to stop by my blog for more ideas!

Tuesday, October 14, 2014

Die Cut Negatives as a DIY Stencil

Hi Friends!  Kari from the Inspiration Team with you today to share with you on how you can stretch out your die cuts - particularly the negatives.  Now I recently purchased some Modeling Creme by Viva Decor in Mother of Pearl ( I am gearing up for Christmas Cards, can't you tell? ) so I wanted to see what would happen when I used the birch tree dies from Joy to the Woods, and use the negative and use it as a stencil.

First - Here is my completed card.


Overall, I think my experiment didn't turn out too bad.  The longest part of this whole process was drying time of the modeling creme.  So - it literally took me several hours to complete this card from start to finish - so its not one to duplicate I don't think.  
I die cut out the trees from white card stock, and I applied my DIY Stencil to my Smoke card stock panel, and applied the Modeling Creme, and I wanted a thin layer as possible. I removed my DIY stencil and allowed this to air dry for well over an hour...maybe even two.  I knew I wanted to add some snow, so I took another stencil I have - the falling snow stencil and I used it to apply more modeling creme.  I will use a line I have heard from the awesome Jennifer McGuire - we make handmade cards, not HallMark, so with that said when I went to remove my falling snow Stencil, it messed up my trees toward the top.  I check it and it was dry - or so I thought, so I had to allow the snow to dry before fixing my trees.  I reapplied my DIY stencil, and fixed as best as I could, my trees. They didn't turn out as smooth as I wanted, but I didn't want to scrap it after all the time it took to come as far as I did.  So - I just set it aside again to dry.  In the meantime, I stamped and die cut the Cardinal from this set - so pretty, and I die cut my sentiment "Joy" from the Lawn Fawn Die.  I die cut a red layer and three white layers.


Below I wanted to share with you my DIY stencil.  When going into this I knew that I would not be reusing this stencil, which is fine with me.


I hope this inspires you to look at your dies in a new way to use them as a stencil to see what cool creations you can make!

See you all again soon!
Kari


Thursday, October 9, 2014

Using non-Christmas set for a Christmas Card

Hi everyone! Thanks for coming by to Lawnscaping Challenge blog. It's me, Marina, here again to share with you a new card that I've made. Last month, I used a Christmas stamp set to make a non-Christmas card, but today, I'm doing the opposite. Kind of ;)

I've taken the Sweater Weather stamp set to make a little tree. I know that my choice of colours still looks like a Fall theme card but you can turn it into a christmas card by the magic of sentiments & embellishments.


For this card, I only use 3 ink colours, Green, Red and Orange. But if you look closely, there's 2 shades of green. I've used the second-generation stamping technique to make different dimensions to the tree. It's a great way to get more out of the ink pads you already have.


I've added the red and glittery bow to make the card look Christmas-y. The sentiments are from the Winter Penguin & Sweet Christmas.


Thanks for stopping by! Let me know what you think and hope to see you again!

Tuesday, August 12, 2014

Thank You Mini Treat Bags

Hi everyone!  Kari from the FIT back with you today.  I am sharing a fun and easy way to dress up some mini bags that you can give as gifts for a birthday, thank you, or really anytime.  I am focusing on making thank you treat bags today.
These particular treat bags are from Whisker Graphics.  They are really inexpensive, and you can get them a various online stores, or even a local scrapbook store near you might even have them.  I had to buy mine online as I don't have any scrapbook stores around me ( yea - it sucks - ha) Anyhoo - I am using an oldy but a goodie Lawn Fawn stamp set called Many Thanks.  I love this set :)
Here are these fun little treat bags all dolled up!


You can put a multitude of different bite size goodies in here...here I am showing you that you can fit a Reese's cup :)  And, don't think I didn't eat one while writing up this post *wink*

Here is a close up up these sentiments that I stamped, cut out and adhered on these bags with some foam adhesive.  


I did a little masking on each sentiment to get different colors that I wanted - for the first I of course wanted different colored lollipops, and I inked those up with Rose Bud, Bamboo Leaves and Dandelion Memento Inks, and for the other sentiment I inked it up in Versa Fine Onyx Black and Tangelo Memento Ink.  And, of course I added a bit of shimmer with my Wink of Stella Glitter Marker!  Fun huh!  

I hope this gives you an idea to dress up those treat bags and give for when you just want to give a little something sweet :)

Thanks for stopping by today on the blog!  I'll see you next month!

Kari


Tuesday, July 8, 2014

Hi There - featuring Our Friendship Grows

Hello everyone!! Kari back with you to share more on my card that I made for our newest challenge that just went up yesterday!!  We are doing a summer color combo - so one of my favorites that I thought would fit the bill is Our Friendship Grows.


I first die cut all of my frame pieces from the Hello, Sunshine 6x6 - still one of my favorite paper pads!  So happy I have a backup of this one! Then, I worked on my sunflower.  I stamped it out in Memento Tuxedo Black as I used Copic Markers to color it in.  I only used 3 colors still sticking with our color combo challenge but wanting to add definition.  I am no where near an expert when it comes to coloring with Copics - but that is just it...these markers make an amateur like me look pretty decent in my opinion.  Once I was finished coloring in my sunflower, I used the coordinating die to cut it out ( thank goodness there are dies for this set!).  I prepared my card base which is the Simon Says Stamp 120 Ultra thick white card stock and I adhered my "Hello, Sunshine" scalloped piece straight down onto my card base and then I stamped my sentiment that comes from the Simon Says Stamp Stripe Greetings set and then added some Lawn Trimmings to my blue piece and then added some foam adhesive and adhered that piece down onto my card, and then added my sunflower also with foam adhesive.  For a final touch, I added some Wink of Stella ( the clear is my favorite) and some Glossy Accents.  These two together are so fun!!


I hope you are able to join us for this newest challenge!!  Can't wait to see all the beautiful projects linked up in the gallery!!  See you all next time!!
Kari


Tuesday, June 10, 2014

Flip-it Card ( You Brighten My Life)

Hey fans of Lawnscaping! Kari back with you to share another project with you.  Today, I have a flip it card for you!  Now - I am not about to tell you that I cut my card stock certain ways, and different increments of scoring - This is all done with a Sizzix die set - QUICK and EASY!  That's how I like it!

I also wanted to ink up some of my new Lawn Fawns sets I recently received from the new release!  This time I inked up Life is Good.


I also used papers from the "Lets Polka" 6x6 pad as well as the Rain Showers Lawn Cuts.


I didn't get a good pic of it but I also added some Wink of Stella to my sun and the sea gulls :)


I stamped out in Memento Tuxedo Black ink the sentiment "You Brighten My Life".  It is a fun interactive card  that will have the recipient asking "How'd you do that?"  :)

Thanks for stopping my the blog today!!

Kari


Tuesday, February 11, 2014

Ombre Glittered Hearts

Hello there!! Kari back with you on this Tues. to share with you another project hopefully to inspire you!!  I am continuing on with our current challenge - Hearts and Dots - and also thinking of Valentine's Day which is Friday!!  It is upon us!


I wanted to create some "ombre" hearts - and I used the heart border from Belinda's Borders, and I first stamped in it in Versa Mark ink, and then applied some Judikins Sticky Stuff, and heat embossed it just enough to its "sticky" stage, and then I added some Martha Stewart glitters in 3 colors to create the "ombre" effect. Once I was done with that process, I die cut my panel using the Stitched Journaling Card Die, and then I stamped the sentiment "sending love your way" from You've Got Mail.  I adhered my panel to some of the new 6x6 Hello Sunshine papers - I chose one of the polka dot patterns.   I also used some Lawn Trimmings to finish things off.  


Don't ya just love all that glitter!! So pretty!! Hope you are able to join us in this week's challenge!!! Thanks for stopping by today!!
Hugs - Kari


Friday, October 11, 2013

Flip It Card Featuring Winter Sparrows

Happy Friday!!!  YAY! We made it to the end of the week - which means the weekend!  I always look forward to the weekends!!  Kari with you today, showing you a cute card I made using the Winter Sparrows set and coordinating Dies.

I am continuing on with this week's challenge which is all about Pattern Paper! I also used pattern papers from both winter lines from Lawn Fawn - FA- LA-LA ( which was last years line ) and this year's Peace, Love, Joy.

I also made a Flip It Card!  There are some dies that can be purchased by Sizzix to do this very card.


If you have ever made Flip it cards - you already know how fun they can be, and how fun it is to give, because it is an interactive card!  This is the front of my card - and I started out by die cutting my card base.  The awesome thing about this - you don't have to do any scoring - it is all done for you in the dies.  I die cut the card base - and then I die cut the two panels of pattern paper to adhere to my card base.  The paper I used for the panels comes from Peace, Love, Joy.  Then, I started on my images - I stamped and die cut one of the cute sparrows, the branch, and some musical notes.  I even paper pieced the sparrows scarf.  It may be difficult to tell in this photo - but I added some Star Dust Stickles to his scarf, and the musical notes.  For the scalloped circle - I used the snowy pattern paper from Fa-La-La.


For the fun part, you just pull the to panels out and it flips open to reveal the inside.  I die cut another scalloped circle, and also a pierced red circle and I stamped my sentiment that comes in the same stamp set "Season's Tweetings" and stamped a few musical notes all in Versa Fine Onyx Black ink.  It is a simple card, but a fun and interactive one.

I hope that this inspires to you join us for our challenge going on for the next week!!  Simon Says Stamp is the awesome sponsor!!  Hope you all have a wonderful weekend!!  

-Kari


Tuesday, September 10, 2013

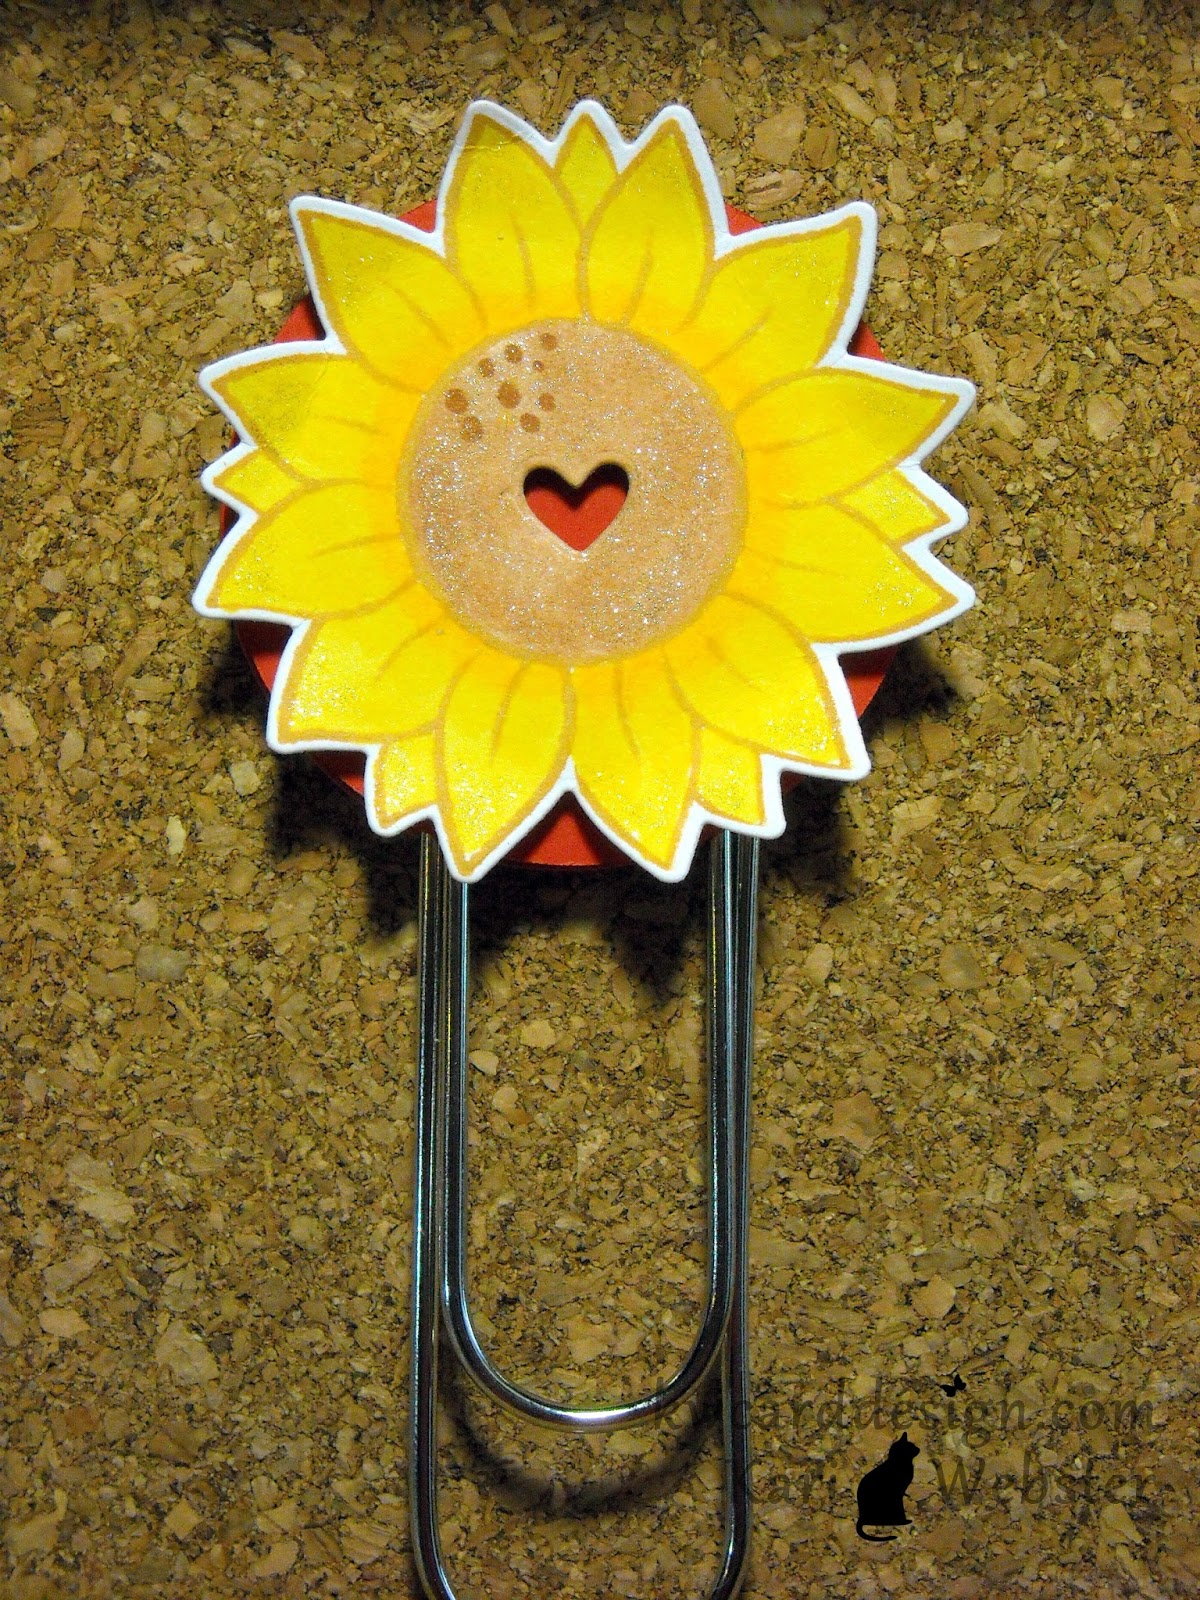
Sunflower Book Marks

Hi Lawnscaping fans!! Kari here with you today from the FB Inspiration Team to show you these cute book marks I made using one of my new favorite sets from Lawn Fawn - Our Friendship Grows along with the coordinating dies.


Here pictured - I made three different ones decorating them three different ways.  It is actually hard for me to pick a favorite!!


For the first one - I stamped out the smaller of the two sunflowers, and stamped it out in Black Tuxedo ink, and added some color using my Copics, and then die cut the flower out using the coordinating die, and also some of the leaves using pattern paper from the Into The Woods 6x6 paper pad.  I thought it would be cute to have this flower backed onto some burlap - so I took a piece of burlap from my DCWV 6x6 pack of burlap and die cut a circle from it!!  Love it!  I also die cut a plain white circle from some white card stock and I adhered the front panel and the back panel to the jumbo paper clip with foam adhesive.  To finish this one off - I used my Wink of Stella glitter pen to add a bit of shimmer and some silk ribbon.


Next up - I stamped out the biggest sunflower in HA's Pumpkin Pie Shadow Ink - and once I did this - I knew I had to be careful coloring it in with Copics - luckily it didn't smear or run too much!  I wasn't thinking fully when I did this - but wanted to give it a shot anyway.  It worked out though.  Then, I wanted to die cut a small heart in the middle - so I used one of my small heart dies, and then I die cut two more circles from some Circus Peanuts card stock from Bazzill and I popped up the sunflower to give it some dimension and adhered it the same way as before to the paper clip.  I also added some shine on this one using the same glitter pen.


And, finally for the third one - I stamped and die cut another big sunflower - again coloring it in with Copics, but I stamped it out in Tuxedo Black ink again.  In the middle I used a 1" circle punch - punched the middle out - and then I die cut a scalloped design circle in more papers from the same 6x6 paper pad and popped up the flower.  I wanted to add the "HI" sentiment from the same stamp set, and then I just added a lot of glossy accents for something different!  Here is a closer look at the middle of the flower.


I knew once I saw this set - it could be used for some many cute things - and I knew I wanted to use these sunflowers to make these book marks!!  Hope this has inspired you to make your own with this awesome set!!

Thanks for stopping by!!
-Kari