Showing posts with label Baaah Humbug. Show all posts

Tuesday, September 27, 2016

Accio Bookmarks

Good morning, everyone! I can never resist anything related to Harry Potter. So when I tried thinking of a fun project to share with you all this month, I naturally put on my sorting hat and got to getting creative.

My oldest wanted some bookmarks, and I obliged by making a set of Harry Potter inspired ones for him. It's pretty fitting since we are finally on Half Blood Prince. It's great to reread those books with him because I get to relive it. And I'm trying reallllly hard to get my youngest interested so I can eventually read them to him as well.

I used a lot of different sets for these which is the fun part. I mean, just imagine all the uses each of these sets have seen from everyone using them! I've listed all the supplies I've used at the bottom to create these. They are double sided in case you're wondering. Each of the bookmarks are 2"x6" for those wanting to make some of your own. These would also be fab stocking stuffers or sent with a gift of a book for someone using whatever they're interested in as the theme. I already have ideas for more!


ACCIO BOOKMARKS!


Here they all are:
1. Quidditch brooms and a golden snitch
2. Gryffindor scarf and Harry's little face complete with lightning bolt scar
3. Mandrakes and earmuffs
4. Hedwig wearing Gryffindor colors on her scarf and letters


I hope you enjoyed my project today and you're inspired to take a good look at your stamps and create something for yourself, or a loved one, teacher, daycare provider, or whoever would love a custom set of fun bookmarks themed with something they adore. Thanks for checking them out! 

PRODUCTS USED:
  • Lawn Fawn Baaah Humbug
  • Lawn Fawn Winter Owl
  • Lawn Fawn Sweet Smiles
  • Lawn Fawn Making Frosty Friends
  • Lawn Fawn Dream
  • Lawn Fawn Let's Bokeh Lawn Cuts
  • Lawn Fawn Bugs & Kisses
  • Lawn Fawn Trim the Tree
  • Lawn Fawn Happy Trails
  • Lawn Fawn You've Got Mail
  • Spectrum Aqua Markers
  • Spectrum Aqua Watercolor Cardstock
  • Spectrum Sparkle Pens
  • Memento Luxe, Rich Cocoa
  • Versafine, Onyx Black


Tuesday, April 19, 2016

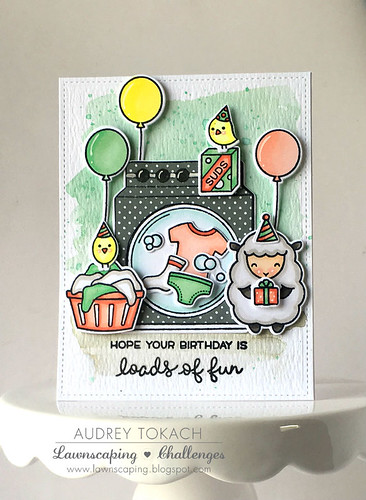
Loads of Birthday Fun!


Hello there!  Audrey here! Today I have a fun card to share with you that mixes and matches a bunch of my favorite Lawn Fawn stamp sets!

To start my card, I diecut a piece of Tim Holtz Distress Watercolor paper with the largest die in the Large Stitched Rectangles Stackables die set. I challenged myself to use a color combo that seems to be everywhere lately - Mint and Coral.  Truth by told, I don't love these colors (I'm probably the only one on the planet that feels this way LOL!), which is why I challenged myself.  I watercolored a background with Cracked Pistachio and Pumice Stone distress inks.  A while back, I saw a polka dot washer and dryer on Pinterest, and I couldn't wait to recreate it by paper piecing the washer from the Loads of Fun stamp set with some Lawn Fawn patterned paper!  I stamped and colored a bunch of other images from that set and die cut them with the coordinating dies.  Inspired by one of the sentiments in the stamp set, I decided to create a birthday card, and pulled out my Party Animal stamp set, and I will never turn down the opportunity to use the Baaah Humbug sheep.  He's the cutest!  I played around with placement, and adhered some pieces with a glue pen, and others popped up with foam tape.  Finally, I glued the panel to a white card base.

Loads of Birthday Fun!

I am quite happy with how this turned out.  I sure to love mixing and matching my Lawn Fawn stamps, especially when it's an unlikely combination.  Stretching your stamps = more bang for your buck!

Hope you like!  That's all for me today!  Thanks for stopping by! :)

Supplies:

All listed and linked above ;)

Tuesday, December 22, 2015

Holiday Joy Card

Good morning! Roxanne here today with a holiday themed card I created. Let's check it out! My supplies are listed at the end as well.


I wanted to make something really bright and cheery for a holiday card. I used the green tree paper from the 6x6 Snow Day Paper Pack and cut to my card size (4.25x5.25) and adhered to the card base. That green is the perfect color for the other elements I used. It makes them really pop off the page. Okay, foam adhesive helped there too ;)


I diecut the "joy" from the Scripty Joy Lawn Cuts out of some beautiful shimmering cardstock in Candy Red (what a perfect name). I trimmed some foam adhesive down to fit onto the back because I really wanted dimension to this card.


For the circle elements, I used the Let's Bokeh Lawn Cuts and cut out 5 circles out of the largest die out of my white cardstock I used for coloring. I stamped my little elements in there using the Baaah Humbug set. I colored them all in with my Spectrum Noir Markers and added some sheen in there with my Spectrum Noir Sparkle Pens. I wish you could see the sparkle it adds!


I arranged the circles and joy diecut on my card and used foam adhesive for everything to pop it up off that bright green tree paper. I hope you enjoyed my project. There is still a little time to create some adorable holiday cards, or even a quick gift of thank you notes, matching envelopes and a pretty pen for giving. Happy Holidays!

SUPPLIES USED:
  • Let's Bokeh Lawn Cuts
  • Scripty Joy Lawn Cuts
  • Baaah Humbug
  • Crafter's Companion Shimming Cardstock, Candy Red
  • Distress Ink, Evergreen Bough
  • Memento Luxe, Love Letter
  • Spectrum Noir Markers: IG1, IG4, IG7, GG1, JG1, JG3, DG1, DG3, TB2, TB4, IB1, LG1, LY3, TN3, CR5, IG2, Blender
  • Spectrum Noir Sparkle Pens: Moonstone, Crystal Clear, Moonlight


Friday, December 11, 2015

A Tag and Gift Envelope Combo!

Hi, everybody! Suzanne here with you today to share a tag and a gift envelope that I made with Lawn Fawn's Goodie Bag die! With so much going on at this time of year, I love discovering and sharing ideas that make everything that's on my to-do list a little easier! 


This gift envelope was inspired by a tutorial that I did earlier this year. I used the pieces cut with the Goodie Bag Lawn Cuts die and rearranged them to make an envelope that's the perfect size for a gift card. You can check out the full tutorial HERE.


I chose paper from the Let's Bokeh in the Snow petite paper pack to make the envelope and stamps from the Toboggan Together set to decorate the front.

I used the Gingham Backdrops set to make a glittery background for my tag:


I chose the sweet little skunk from the special limited stamp set offered by Lawn Fawn to Black Friday shoppers and dressed him up with the hat and present in the Baaah Humbug set. Instead of "naughty or nice", I mixed a few of my Lawn Fawn sets to make a "skunky" sentiment.

And, don't forget about the current Lawnscaping Challenge...you could win a $25.00 gift card from the fabulous Ellen Hutson on-line store!


Thanks so much for stopping by today! I hope you have a wonderful weekend filled with lots of crafting time!


Friday, December 4, 2015

Feliz Navidad

Hi everyone! Marina here! Of course, I will be doing something Christmas related! Hehe, I'm in such a Christmas mood so I hope this would give you some ideas if you are planning to make some christmas cards. If you're like me and you are stuck with the few christmas sets that you have, I hope this post will give you some ideas on how you can use your non- christmas sets to make a christmas card.


I know I did use the christmas sets to make this card but, you can look through the sets you can have pick up small items like gift boxes, flowers, starts etc to make your own background.  I used the tiny images from the baaah humbug set. I usually like to fill the whole card base but I thought I'll just put it at the bottom and use Peeled Paint Distress Ink to add quick colour. The red and gold are just some stickles. You can also use copics or other things that you have.

I used the violet's ABC to make my own customised sentiment to combine with the baaah humbug set. That's really it.  :D I hope you are inspired and I would love to see what cards you've been making.


I hope it will inspire you to find more looks for your stamps! Cheers!

Friday, October 2, 2015

2 Stamps, 2 Different Looks

Hi everyone! Marina here! I actually made a video for these cards but my imovie was being weird :( Hopefully it'll work next time, so I hope you'll look out for my post next month!

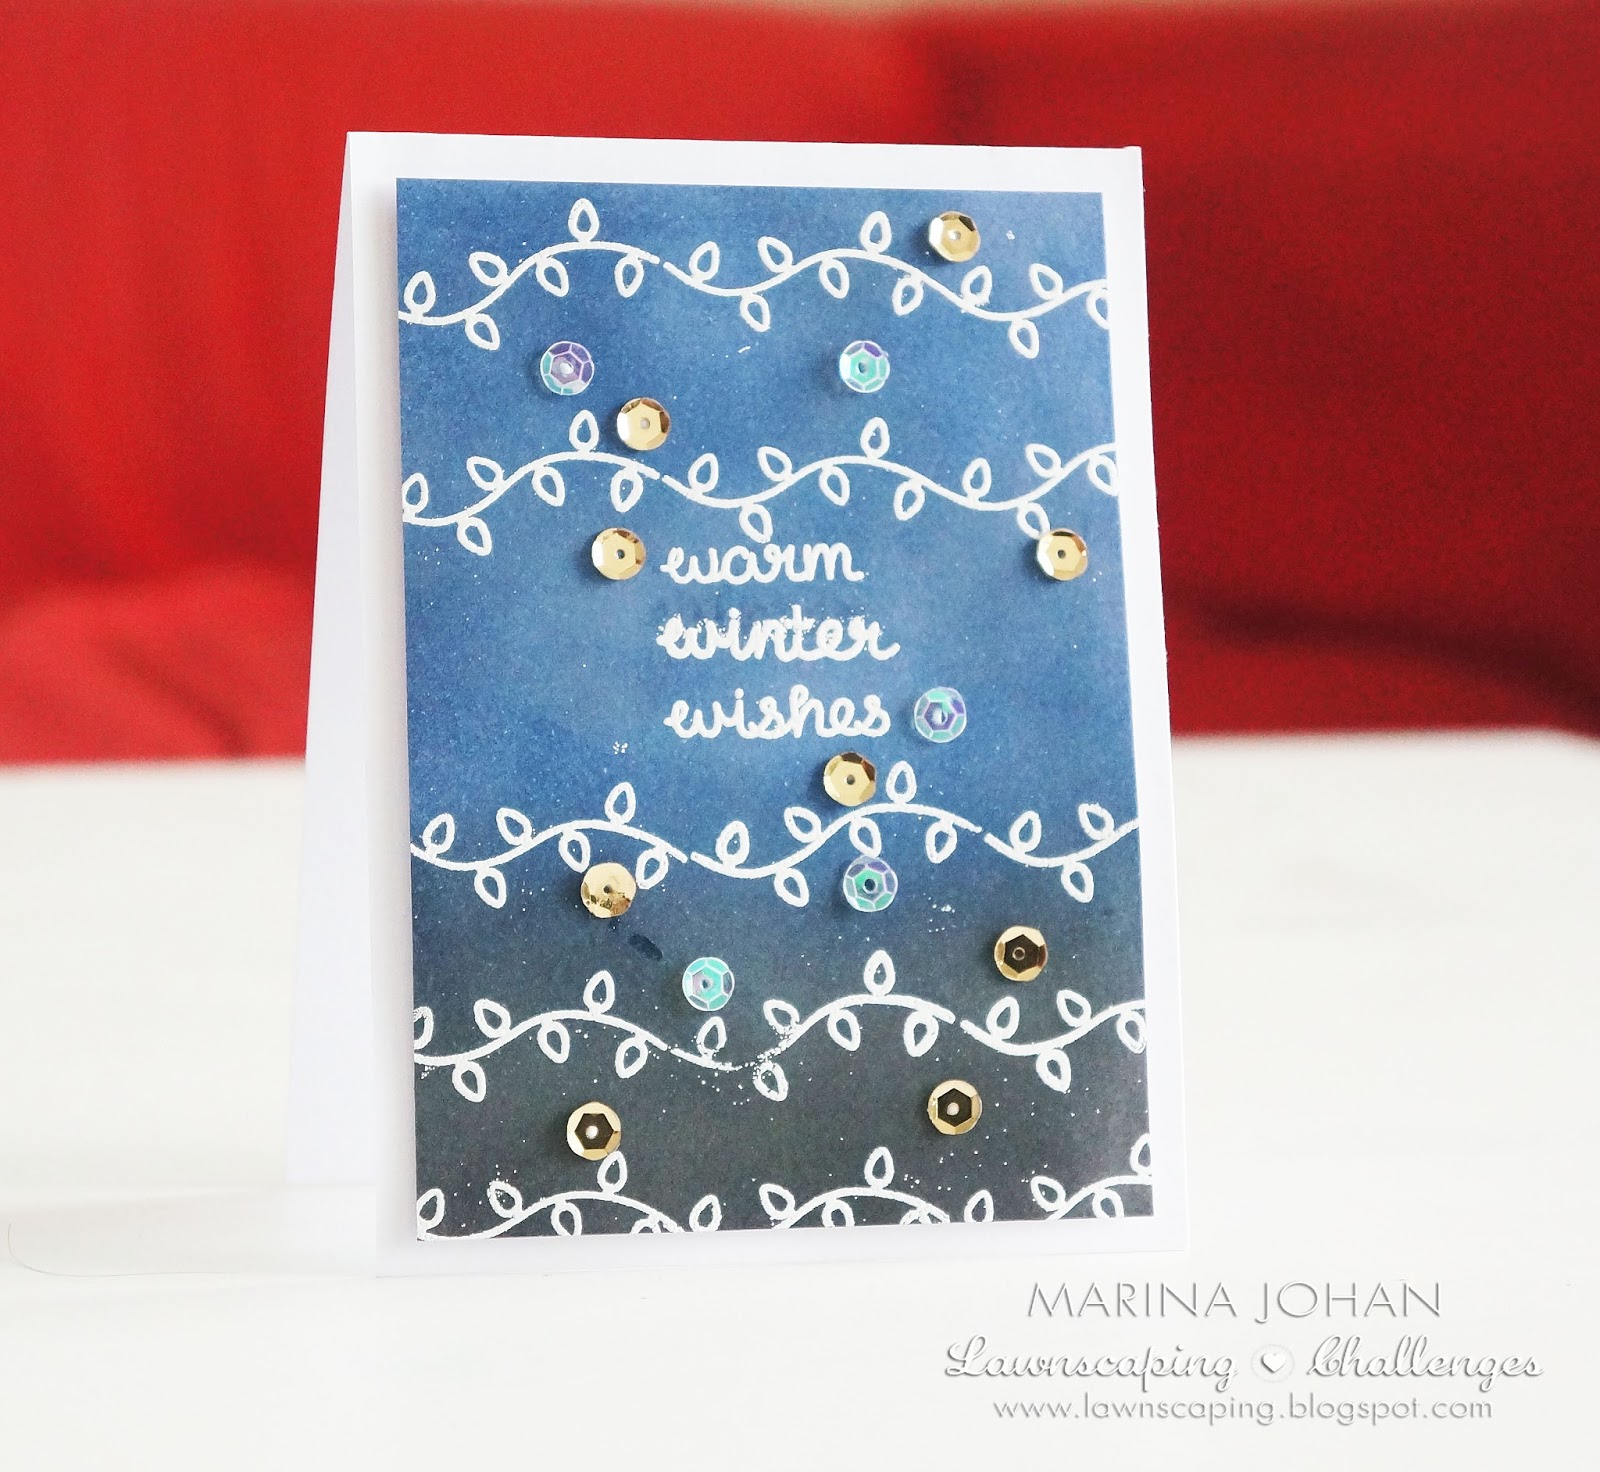
I would like to share two very simple cards using only 2 stamps but producing two very different looks! The lights and sentiments are from the Baaaah Humbug stamp set.

For the first card, I wanted to keep it one layer and bright and colourful. I just took the lights and start to stamp them next to each other. Colouring the bulbs with copics and adding some gold stickles for some shimmer.


The next one is more night time look.  I used Black Soot & Faded Jeans for the night sky look. Instead of colouring the bulbs, I just embossed it with Hero Arts white embossing powder and used Pretty Pink Posh sequins for embellishments.


I hope it will inspire you to find more looks for your stamps! Cheers!

Monday, September 28, 2015

One Layer Fall and Christmas Cards


Hello everybody, Heidi here, welcome to the Lawnscaping Challenge blog. We are currently having our Lawnscaping Challenge No. 114 "One Layer Cards", sponsored by Lawn Fawn. If you haven't enter it, you can do it HERE
To inspire you to participate, I had created couple of one layer cards, one for fall and one for Christmas. One layers cards are great for mailing, and also can be quickly made. So here are the cards that I made, I hope you'll enjoy them and enter this challenge, I can't wait to see all your creations

 For this card I sued the "into the woods" the leaves were from the "Happy harvest" and the banner from "bannerific" stamp sets by Lawn Fawn. I used a little bit of masking and I finished the card with some 4mm sequins. 

For this card I got inspired on a card that I made back in July, however it wasn't a one layer card nor a Christmas card, but the idea came from that card you can see the card here. For this card I used the "Baaah Humbug" stamp set, some masking, and some subtle ink blending. I used the stitched borders to emboss some decorative border along the left and bottom sides of the card, and finished with some sequins.

Masking is a great way to add dimensions to a one layer card. you can do a lot more complex masking, or you could make simple fast cards to send easily over the mail, the possibilities are endless. 

I hoped you enjoyed these cards and that you give them a try. I also hope that you enter the current Lawnscaping Challenge.
Have a wonderful week!