Showing posts with label Distress Ink. Show all posts

Friday, December 2, 2016

Peace and Joy

Hello!
Samantha here, and today I'm sharing a sweet holiday scene with you!


I am totally in LOVE with houses right now! Especially around the holidays, it just seems like houses and snow falling are so warm and cozy!
I used the bird houses from Home Sweet Home stamp set and just made them people houses instead! Ha!


I watercolored all of the images with Distress Markers, and then lined them up in a circular pattern around that watercolor 'sunset' I created!

I used Seedless Preserves, Worn Lipstick and Dried Marigold Distress Inks to create the sweet sunset and then flicked some white acrylic paint on it to add the snow!
I heat embossed the sentiment from Snowy Backdrops stamp set!

Be sure to check back here on Monday for the start of an ALL NEW challenge! Yay! :)
~Samantha

Friday, November 4, 2016

My Christmas Wish

Hello!
Samantha M here, and today I'm sharing a cute little card with my new favorite Christmas image, Winter Unicorn!


I colored that little guy with Zig Clean Color Real Brush markers, and then popped him up over the background!
And speaking of the background, I used Tumbled Glass and Cracked Pistachio Distress inks to create an abstract little scene!


I also used that tiny list image from the Baaah Humbug stamp set! A little glitter on the horn finished off the card! :)
Hopefully this card made you smile and chuckle to yourself!
Be sure to check back here on Monday, when a NEW challenge will start...any guesses?!
~Samantha M

Friday, October 7, 2016

Treat-filled Days are the Best Days!

Hello, and happy Friday!
Samantha M here today, and I'm sharing a fun halloween card with you!


I know, it's adorable, right?! Ha! I dressed up the clam!!!!! I can't even stand it! Ha! Ok, I'm getting ahead of myself, let me start over! Ha!

Ok, I stamped and watercolored images from Mermaid for You, Booyah and Year Six! I used Distress Markers to color and then also used them to create the water-y background! I scribbled Peacock Feathers and Cracked Pistachio onto a scrap piece of plastic packaging, and then mixed them together with some water. Then, I just splatted the whole plastic sheet onto my card front! Once it was dry, I splattered on some white acrylic paint and then used Transliscent Embossing Paste and a wave stencil to add some subtle texture!


The sentiment is from the new Happy Howloween set! So fun!! 
I hope you enjoued this card, and that you're getting into the mood for fall and halloween! Be sure to play along with the current Lawnscaping Challenge, too!! 


Enjoy!
And thanks for spending part of your day with me!
~Samantha M

Monday, September 12, 2016

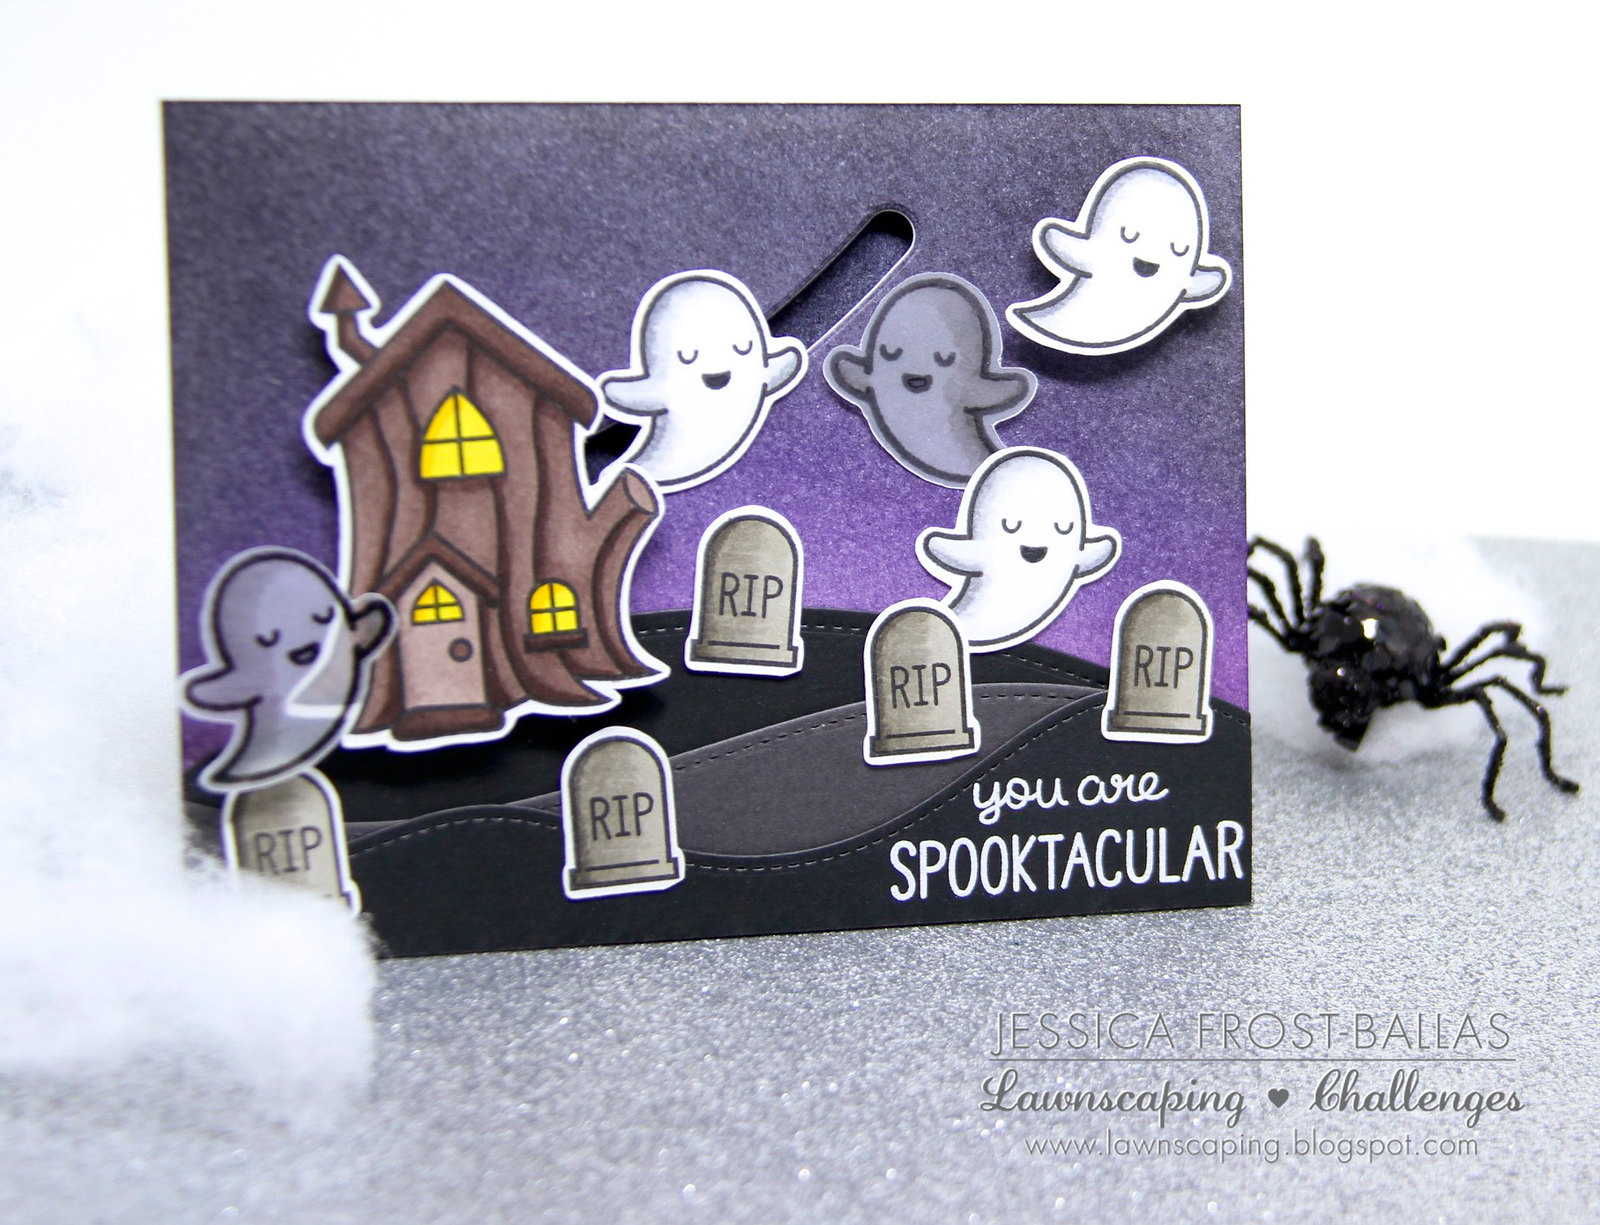
You are Spooktacular!!

Good morning!  Jess here with an interactive Halloween card featuring stamps from Frosty Fairy Friends in an unexpected setting! ;)
ls1
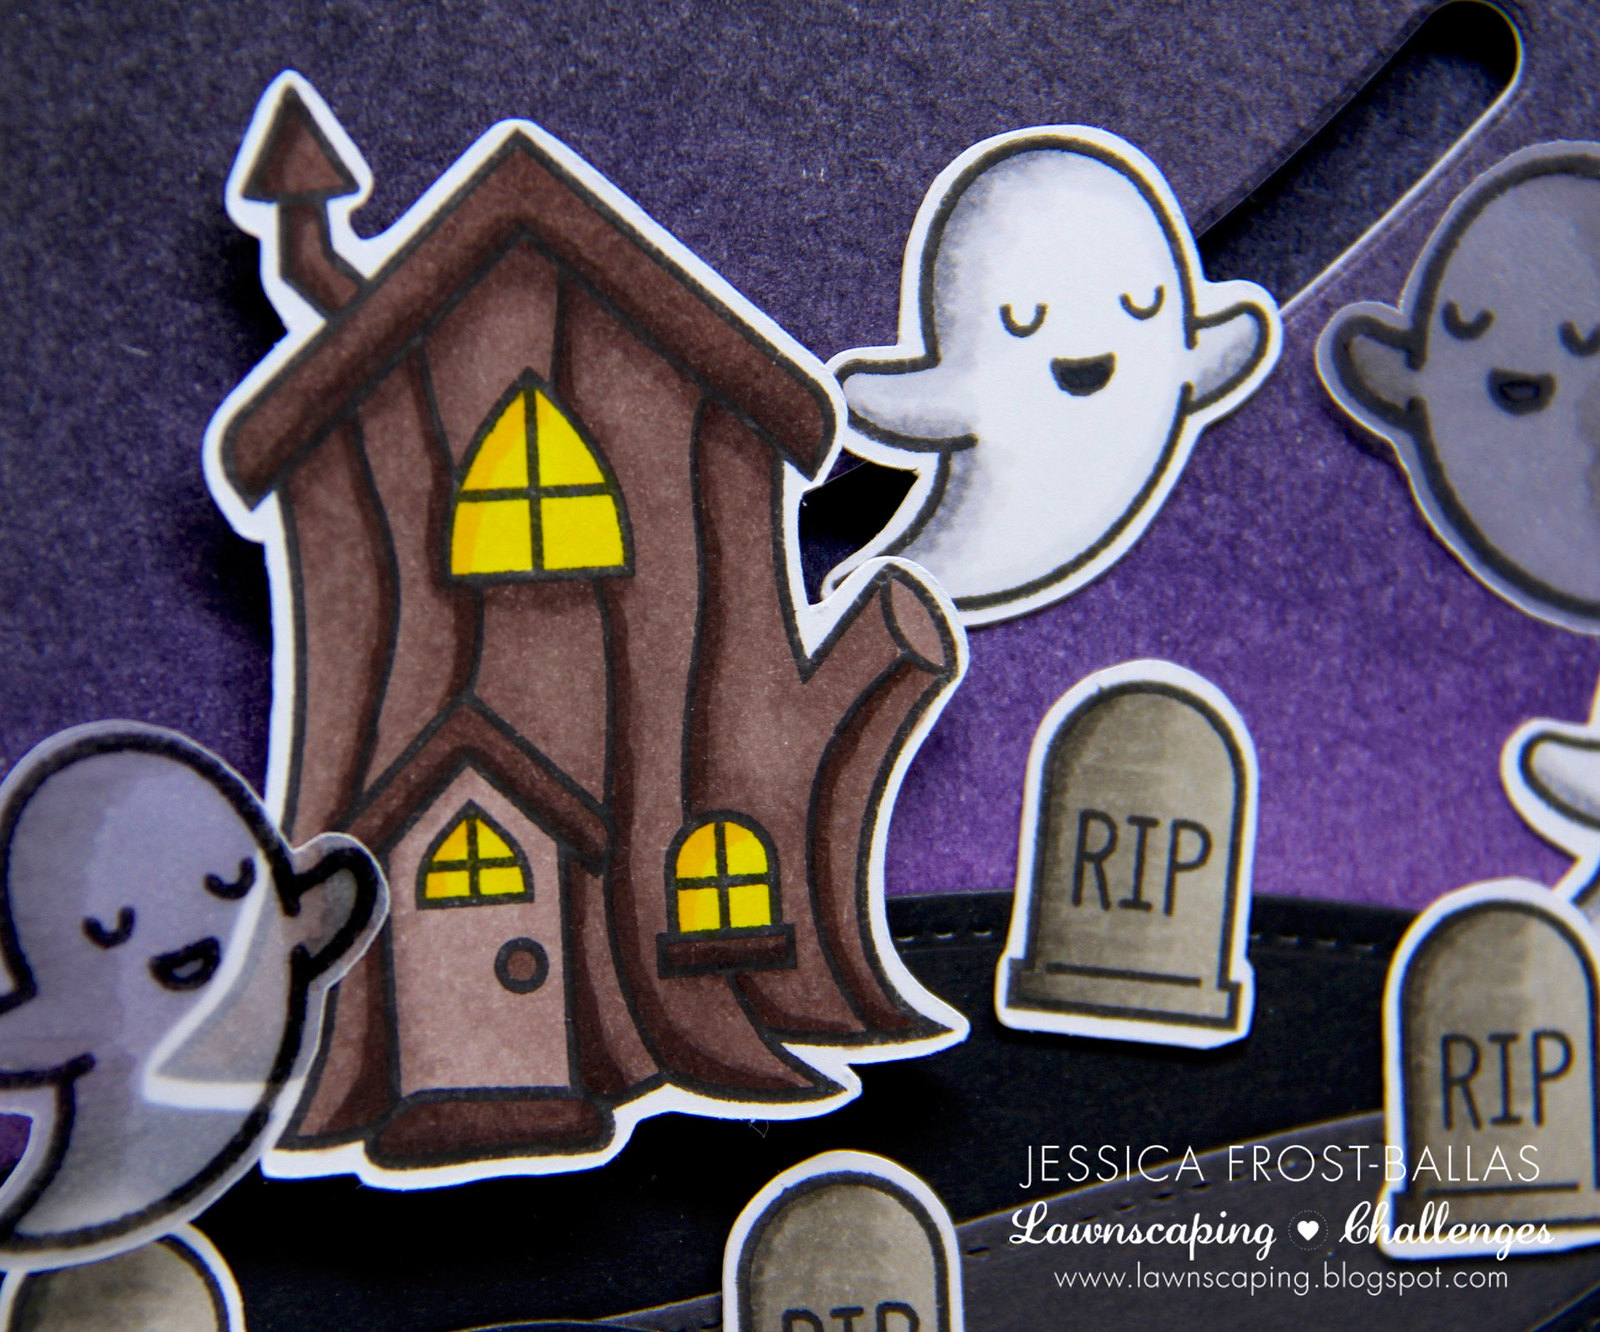
I was looking at that Frosty Fairy Friends house and realized it could be a really creepy haunted house for my ghosts!  I started my card by stamping the ghosts and gravestones from Spooktacular and the house from Frosty Fairy Friends onto white cardstock with copic-friendly ink.  I also stamped a few ghosts on vellum.  I colored all of them with copic markers and die-cut them with the coordinating dies.
ls3
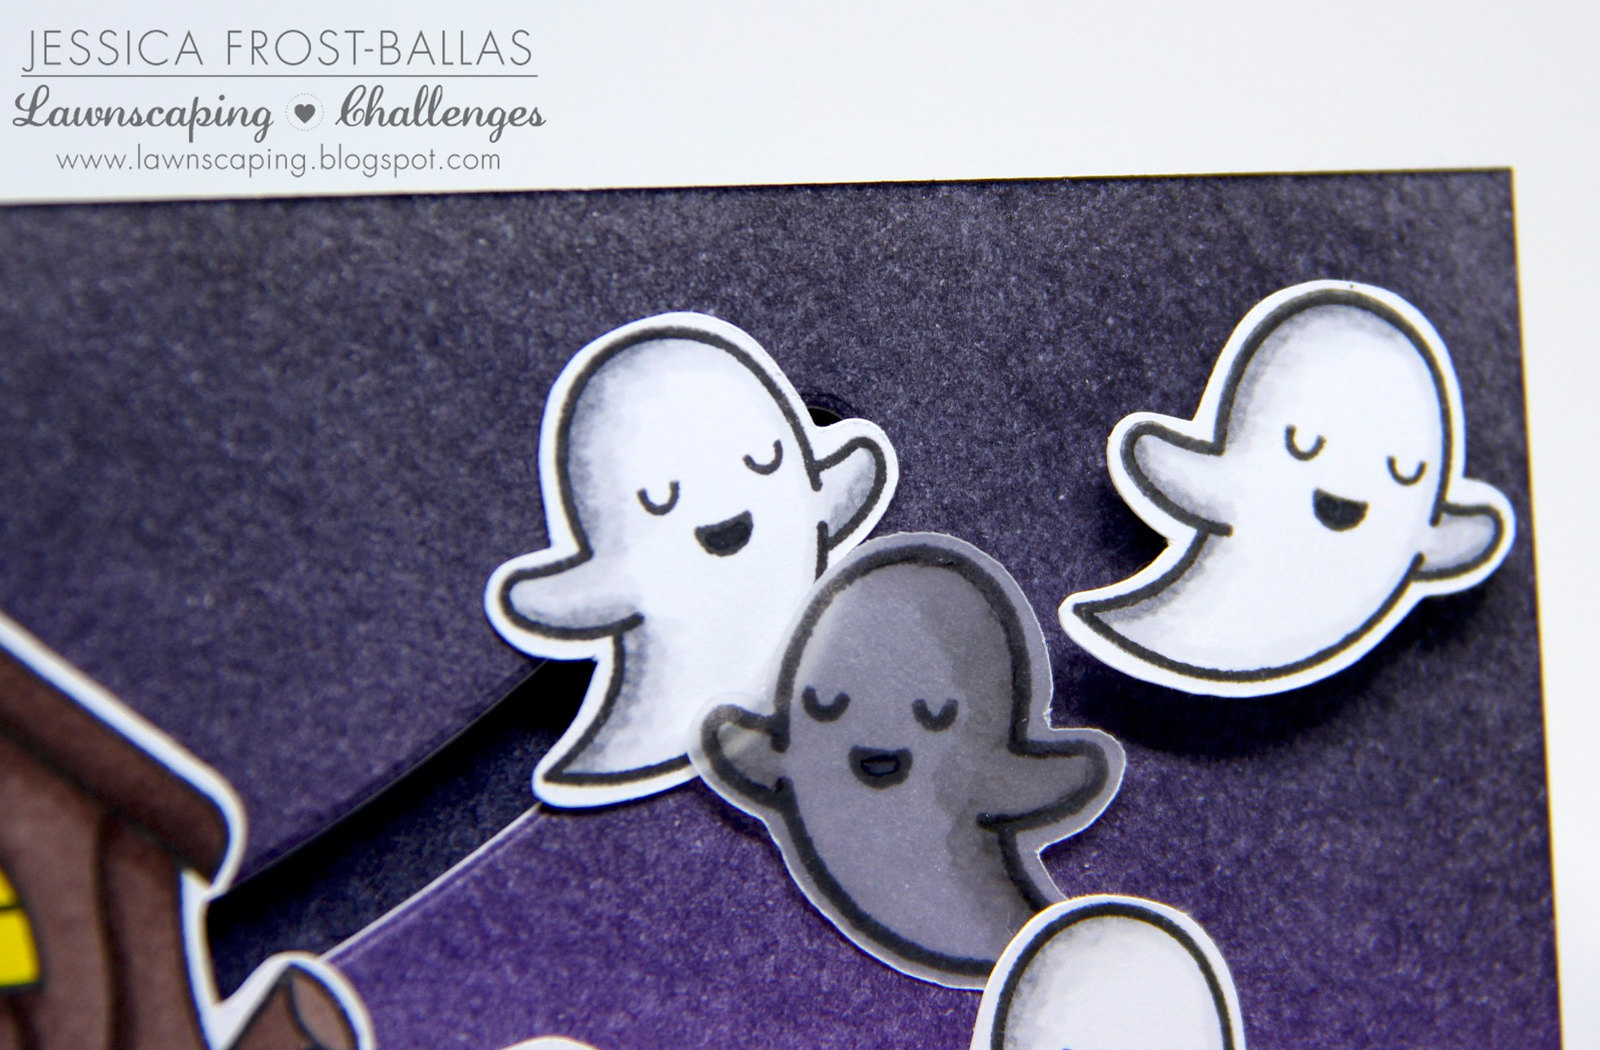
Next I blended Seedless Preserves, Chipped Sapphire, and Black Soot distress ink onto a piece of watercolor paper to create my spooky night sky.  I also blended the same inks onto a scrap piece of watercolor paper to go behind my interactive slider.  I die cut the slider element from the background and several of the stitched hills with dark grey and black cardstock.  I stamped my sentiment onto one of the hills and heat-embossed it with white embossing powder.

Then it was time to assemble my card!  I attached one of the ghosts to the sliding element and then mounted the background onto my card base with a layer of foam mounting tape so the ghost could slide easily.  I adhered my hills to the background and then added the house with foam mounting tape.  I adhered the gravestones and ghosts using a mixture of foam mounting tape and regular adhesive for a change in dimension.  I also flipped one of my vellum ghosts over so that he would be going in the opposite direction.
ls2
And that's my not too spooky Halloween card!  :) Thanks so much for stopping by and have a wonderful week!

-Jessica

Friday, September 2, 2016

Beep beep!

hello!

Samantha M here, and today I'm sharing the first of my (many to come!) Christmas cards! lol!
So let's get to it:


Aw, love that ADORABLE cute, car from the new Home for the Holidays stamp set! I colored all of the images with Zig Clean Color Real Brush Markers and fussy cut it out!


The background of the insta-scene was created with Distress Inks and water and lots of watercoloring! The snow was created with a stencil and some embossing paste! I used the #awesome die set to create that fun scene, all on the SUPER COOL white woodgrain paper!

I heat embossed the sentiment from the new Merry Messages stamp set! Love those sayings on that set!!
This card has a little bit of a hint as to what the new challenge that starts on Monday will be...can you guess?

Thanks again for checking out my card!
~Samantha M

Monday, August 8, 2016

Getting in the holiday spirit!

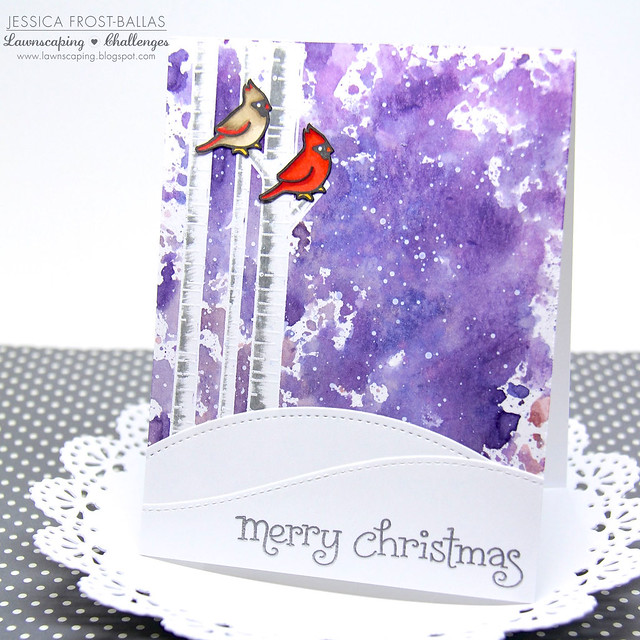
Good morning, Jess here!  I'm telling you...I am SO over hot, humid weather...I made several cards this weekend and realized they all featured snow!  On the plus side it's building my stockpile of Christmas cards! :)
lsaugsolo
To start I stamped the trees from Joy to the Woods with versamark onto watercolor paper and heat-embossed it with white embossing powder.  Then I covered it with frisket and let it dry before I worked on the rest of the background.  I smooshed Seedless Preserves, Chipped Sapphire, and Victorian Velvet distress ink onto a craft mat and then spritzed it with water.  I used my finger to blend the colors around a little and then picked up the ink with a piece of acetate.  I brought the ink to my watercolor paper and smooshed it on.  I repeated the process a few times until I was happy with the coverage and then let it dry.  Once it was totally dry I flicked white paint across the background and let it dry.

Next I rubbed the frisket off of the trees and used Hickory Smoke distress ink and a dry paint brush to add some shading to the trees.  I die-cut two hills from white cardstock using the Simple Stitched Hillside Borders and the Stitched Hillside Borders dies.  I stamped the sentiment from Joy to the Woods with versamark on one hill and heat-embossed it with silver embossing powder. 

Finally I stamped the two cardinals from Joy to the Woods, colored them with copic markers, fussy cut them, and adhered them to the card with foam mounting tape.  And now I'll go back to dreaming about the first snow we'll get this winter!!  Thanks so much for visiting and have a fabulous day!

-Jess

Friday, August 5, 2016

Waving Hello!

Hi there, and happy Friday!
Samantha here, sharing a fun little mermaid card!

I created this card and it actually, also, fits the current challenge going on: Pattern-palooza!!


ok, so maybe the pattern isn't 'palooza-y'...but there is a pattern!! I created the 'ocean' background and then added a small polka dotted pattern with a stencil! :)
The 'ocean' was created with Distress Inks in Peacock Feathers and Chipped Sapphire blending!


I used the adorable Mermaid for You stamp set! I watercolored those cute as can be mermaids with Distress Markers!
And I heat embossed the sentiment in white on some black cardstock, which adds some fun contrast to the card!

Be sure to check out the current challenge with your favorite patterns: stencils/paper/you name it!
Thanks again!
~Samantha

Monday, July 11, 2016

"Wave"ing Hello

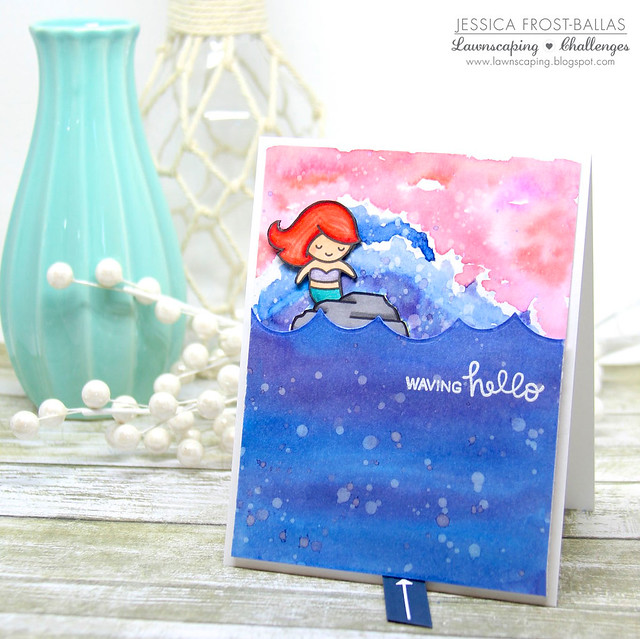
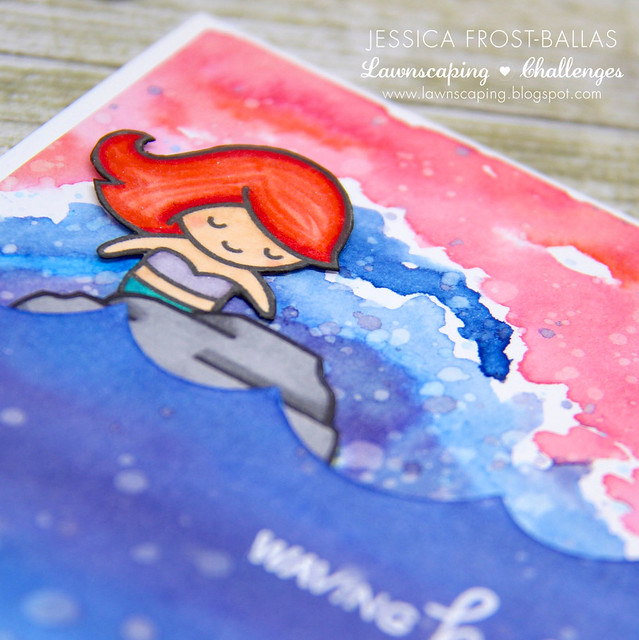
Good morning, Jess here!  If you haven't noticed yet, I'm just a tiny bit obsessed with my Lawn Fawn mermaids!  I was looking at the sentiments in the set and it reminded me of one of my favorite scenes from The Little Mermaid.  As a kid I spent many summers trying to recreate the iconic image of Ariel surrounded by the waves as she hoists herself up on the rock and I thought it would be fun to recreate it on a card! :)
Lawnscaping July Solo 1
And it's me...so of course I had to make it interactive, too!  
Lawnscaping July Solo 3
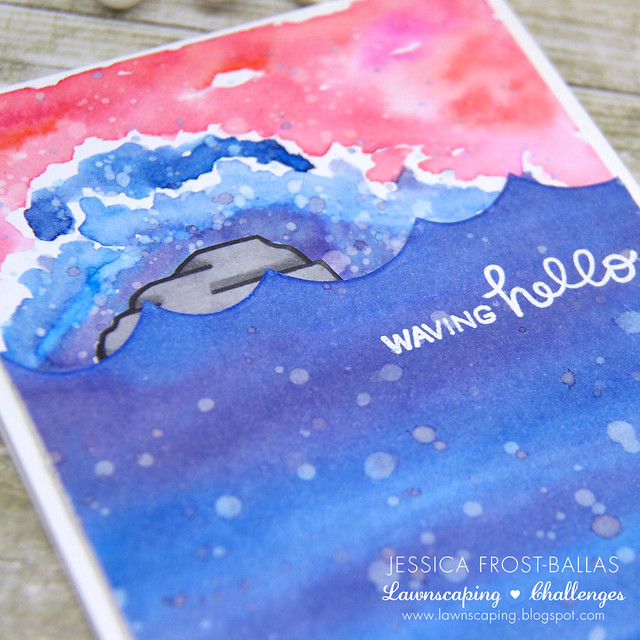
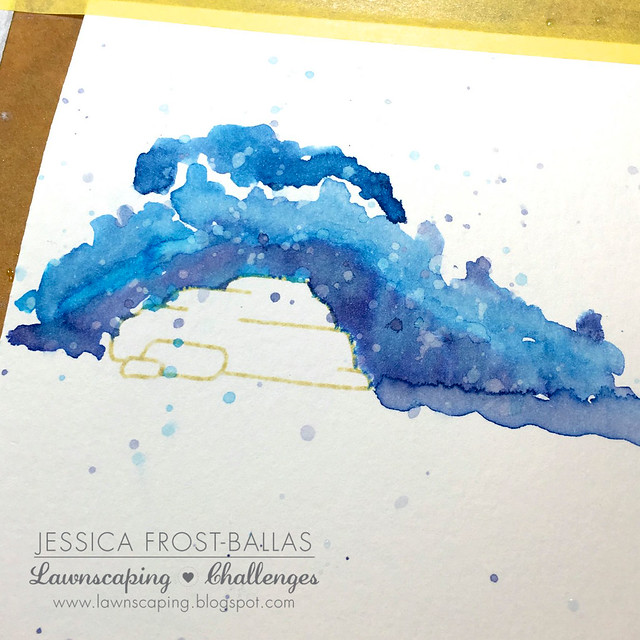
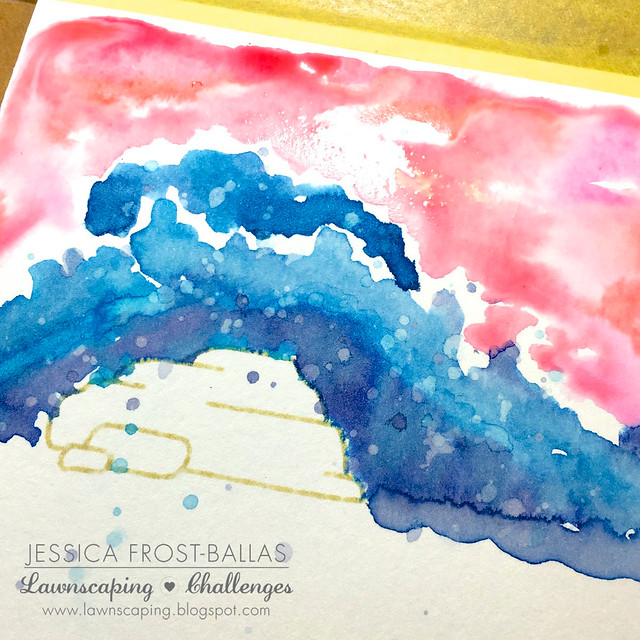
This was a really fun card to create though I was quite nervous about the outcome until it was totally done.  To start off I stamped the rock onto a piece of watercolor paper with antique linen distress ink as a guide for my eventual second layer.  Then I smooshed chipped sapphire, salty ocean, and mermaid lagoon distress ink onto my craft mat for my waves.  First I loosely watercolored a second sheet of watercolor paper with streaks of each color and set that aside to dry while I worked on the background.  I wet the paper around the rock and dropped distress ink into the water with a wet paintbrush allowing it to blend naturally.  I also made sure to leave parts of the paper dry so that it would stay white and resemble the crest and foam of the waves.  Once it was dry I flicked water droplets over the waves and blotted them off after a few seconds.  And I also flicked chipped sapphire and salty ocean distress ink droplets over the paper and let them dry.
lssneak
Next I smooshed abandoned coral, picked raspberry, and spun sugar distress ink onto a craft mat and repeated the process for the sky.  I added additional water droplets and more flicks of chipped sapphire and salty ocean distress ink.
lssneak2
Then I stamped the mermaid and the rock with copic-friendly ink and then colored them with copics.  I added a little shimmer to Ariel's bikini and tail with a spectrum noir sparkle brush.  Next I took two long, thin strips of navy blue cardstock and adhered them over the bottom of Ariel's tail to create a handle.  I stamped the sentiment onto the first piece of watercolor paper I painted and heat-embossed it with white embossing powder.  Then I used the ocean waves border die to die-cut the top of the paper and adhered the rock behind it.  I turned that over and added strips of foam mounting tape to it, leaving a channel where my handle could slide to move Ariel.  I adhered it to the background panel and then slid Ariel into the channel.  Finally I adhered the background panel to a white card base and the card was done! :)
Lawnscaping July Solo 2
I really like the contrast between the soft, dreamy quality of the distress inks and the sharper, bright copic markers.  It kind of reminds me of an old cartoon cel.  Anyway, that's my card and the story behind it! ;)  Thanks so much for visiting today and don't forget to enter the current Lawnscaping Challenge!  Have a wonderful day!
-Jess


Supplies:

Friday, July 1, 2016

Just Waving Hello!

Hi there!

Samantha M here with you today, and I'm sharing a cute little card featuring the ADORABLE narwhal from the Mermaid for You stamp set!


I really LOVE this cute, clean and simple card! I tried to focus all of my attention on the adddddooooorrraaaable narwhal (did I say that? Ha!).
I watercolored the little guy with Distress Markers and then added some dots with a white gel pen and also Distress Markers (I just didn't blend those parts out with water!).


the waves were made with Distress Inks and little light handed blending! They are actually the 'wrong' part of the Ocean Wave Border Dies! SO FUN!!!
I popped up the top wave, and then added a little gold mist drops for some sun! I really think this card is so sweet, and I really hope you did too!

Be sure to come back on Monday, to see what the new challenge will be! Hint: I LOVE IT! Ha! :)
Thanks again for spending part of your day with me!
~Samantha

Tuesday, June 28, 2016

Donut Worry!

Good morning! Roxanne here today with a technique I love. I actually learned this from Chrissie ;) She inspired me to just finally give it a go and once I did, I was hooked. So I had to use it on this card I created today.

I have a weakness. Okay, not just one, but this is a major one. DONUTS. Alllll kinds, but my most favorite are the ones with the pink icing. My youngest calls them lava donuts. I call them heavenly. I could honestly sit and eat an entire dozen. By myself. No joke. But I opted today for the no fat version instead - a card!


Lawn Fawn's Donut Worry set is one I wanted as soon as I saw it. I'm a little obsessed. If I could maintain a figure I could be proud of living on coffee and donuts, that would be amazing. Who's with me?!

So I asked my son what color I should color in my donuts and he looks over and goes, well, pink of course! And that's just what I did. I made this little background, leaving a bit of white space for the sentiment, and colored each of them in with different shades of pink icing. I changed up the color of the sprinkles, too.


Are you craving donuts now?! Sorry, not sorry :)

One more pic just to get you feeling hungry...no, creative. Yes, creative!


Thanks for stopping by to check out the card I made this month! See ya next month. 

PRODUCTS USED:
  • Lawn Fawn Donut Worry
  • Lawn Fawn Sequins
  • Spectrum Noir Watercolor Cardstock
  • Spectrum Aqua Markers
  • Memento Ink, Rich Cocoa
  • Radiant Neon Ink, Electric Pink
  • Memento Luxe Ink, Wedding Dress & Sweet Plum
  • Distress Ink, Tea Dye
  • Versafine Ink, Onyx Black

Wednesday, June 22, 2016

Watercolor Waving Hello with Christy

Hey crafty friends! Good morning! It's Christy here with another card for our current challenge: Distress Mania! I created by background by blending on a whole bunch of Distress Inks, Antique Linen, Gathered Twigs, Tumbled Glass, Peacock Feathers, Salty Ocean, Evergreen Baugh, and a little Pine Needles. Then I took a paintbrush and flicked some water over top and blotted it away with a paper towel for an even more distressed look.

Then I watercolored my images from Mermaid For You with Zig Clean Color Real Brush Pens, popping some of them up with foam tape and gluing others flat to the card to create the look of dimension. I thought I was done, but while snapping the photos, the mermaid's tail was just crying for some glitter, so I added some Stickles for a fun pop of sparkle here and there.

I hope you enjoy it! You still have a week to play along in our Distress Mania challenge. Hope to see your projects there!


SaveSave

Tuesday, June 21, 2016

Waving Hello with Audrey!

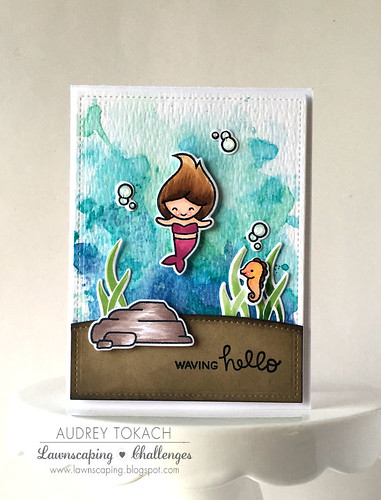
Hello there!  Audrey here!  Today I have a card to share with you that goes along with our current challenge... Distress Mania!  I used Distress Inks to "ink smoosh" my underwater background!  If you are not familiar with "ink smooshing", it's very easy to do and the results are so fun!  You will never get the same effect twice!  All you need are Distress Inks and a piece of acetate or old plastic packaging.  You can even use a sandwich bag.  You just press the ink pad onto the plastic, add a few squirts of water, and press the wet ink on to your paper.  I prefer to dry each layer before moving onto the next, but you don't have to if you prefer not to.  The colors will just mix together more.

Once my background was completely dry, I added a stitched edge with the largest die in the Small Stitched Rectangles Stackables die set.  I cut a second stitched rectangle from kraft cardstock, and used the Simple Stitched Hillside Borders to add a slope to my sand.  For added dimension, I added some Walnut Stain Distress ink to the edges with an ink blending tool.  I stamped and colored a mermaid, rock, seaweed and the cute little seahorse from the Mermaid for You stamp set and then diecut them using coordinating dies.  I adhered some pieces flat with a glue pen, and some with foam tape, and added a sentiment from the same stamp set.  Then I mounted the panel to a white card base using more foam tape.

Waving Hello

That's all for me today!!  Thanks for stopping by! :)


Tuesday, May 24, 2016

Happy Birthday Muggle!

Good morning! Roxanne here today with a card that will make all you Harry Potter fans out there swoon. I must admit, this project knocked off my own socks.

Anyone who knows me knows I LOVE, LOVE, LOOOOOOOVE Harry Potter. I'd turn my room into a Hogwarts dream if I could. No joke.

So I was sitting wondering what type of project I was going to make for my post this month and I grabbed the owl from the Lawn Fawn Winter Owl and knew exactly what I wanted to do. I mean, he's wearing a scarf, so that right there screams HP to me. I cannot be the only one ;)

Once I started coloring him, the idea to put him on a broom came to mind. Then it was like a domino effect and I came up with this...


I made him into Harry Potter playing Quidditch. I thought this is perfect to give to the Harry Potter fan in my life, or just keep for myself to display. Either way! 

For the background, I used Distress Inks in Dusty Concord and Tumbled Glass and Memento in Nautical Blue with craft sponges and I made this magical looking sky. 


I then took some yellow patterend paper I had and cut a skinny strip for the stand and then two dies to make the opening of the Quidditch goal. I glued that down to the sky scene. For the sentiment, I took the happy birthday from the Lawn Fawn Party Animal set and stacked them. Under that, I used Milo's ABC's for spelling out MUGGLE! I gave the Muggle a bit of a shadow with some white ink behind it. 


I used the broom from the Lawn Fawn Critters in Costume, colored in with my Spetrum Noir Alcohol Markers and fussy cut it out. I used trimmed down foam adhesive behind it to give it dimension. 
Then I colored in Harry. I used a fine tip marker to draw on the scar to give it that special touch! Harry sports his scar, so this is no different! I placed him on the broom with some more foam adhesive. 


For the stars, I used some small rhinestones I had to make it sparkle a bit and bring some more life to this card. 

I hope you enjoyed my project today as much as I enjoyed making it! Thanks for stopping by. 

PRODUCTS USED:
  • Lawn Fawn Milo's ABC's
  • Lawn Fawn Winter Owl
  • Lawn Fawn Critters in Costume
  • Lawn Fawn Party Animal
  • Distress Ink: Dusty Concord and Tumbled Glass
  • Memento Ink: Tuxedo Black and Nautical Blue
  • Spectrum Noir Alcohol Markers: GB1, GB5, DR7, TN1, TN3, TN5, TN8, EB4, EB8, OR2, CR8