Showing posts with label Mermaid for You. Show all posts

Wednesday, July 27, 2016

You're Fintastic, Best Fishes

Hey everyone! Christy here. I'm super excited to be featured on the blog today with another card for our Rainbow Challenge! A friend from my writer's group is moving away, so I decided to make a tri-fold card with a peek-a-boo window, depicting a fish transitioning from a tank into the ocean.


I combined images from Lawn Fawn's Fantastic Friends with a few from Mermaid For You for a little more variety. These sets play so nicely together. I created my background by drawing waves on some Bristol Smooth Surface paper using my Zig Clean Color Real Brush Pens, then watercolored right over top and flicked on additional clean water for a bubble effect. I also watercolored my images in a rainbow of colors to fit our challenge.


I then glued my Bristol to the second panel of my tri-fold card and stamped a sentiment on the center panel, leaving plenty of white space for the entire group to write their messages. It was a big hit at her Going Away Party this week, and she said she's going to keep it up on her desk in her new home to remember us all by.


Our challenge ends this evening, so still have a few hours to enter if you haven't had a chance yet. I can't wait to see all your gorgeous rainbow colored projects! The winner will receive a FREE stamp set of their choice from Lawn Fawn! Definitely a great incentive.


Thanks so much for stopping by today!

SaveSave

You're Fintastic, Best Fishes

Hey everyone! Christy here. I'm super excited to be featured on the blog today with another card for our Rainbow Challenge! A friend from my writer's group is moving away, so I decided to make a tri-fold card with a peek-a-boo window, depicting a fish transitioning from a tank into the ocean.


I combined images from Lawn Fawn's Fantastic Friends with a few from Mermaid For You for a little more variety. These sets play so nicely together. I created my background by drawing waves on some Bristol Smooth Surface paper using my Zig Clean Color Real Brush Pens, then watercolored right over top and flicked on additional clean water for a bubble effect. I also watercolored my images in a rainbow of colors to fit our challenge.


I then glued my Bristol to the second panel of my tri-fold card and stamped a sentiment on the center panel, leaving plenty of white space for the entire group to write their messages. It was a big hit at her Going Away Party this week, and she said she's going to keep it up on her desk in her new home to remember us all by.


Our challenge ends this evening, so still have a few hours to enter if you haven't had a chance yet. I can't wait to see all your gorgeous rainbow colored projects! The winner will receive a FREE stamp set of their choice from Lawn Fawn! Definitely a great incentive.


Thanks so much for stopping by today!

SaveSave

Monday, July 11, 2016

"Wave"ing Hello

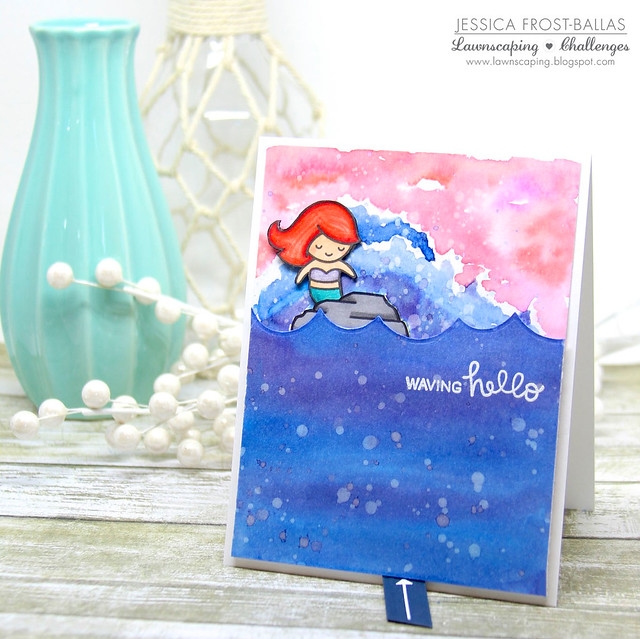
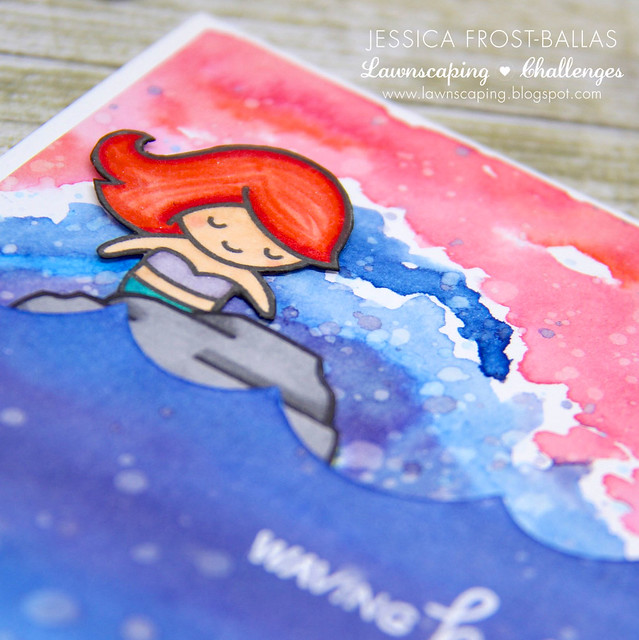
Good morning, Jess here!  If you haven't noticed yet, I'm just a tiny bit obsessed with my Lawn Fawn mermaids!  I was looking at the sentiments in the set and it reminded me of one of my favorite scenes from The Little Mermaid.  As a kid I spent many summers trying to recreate the iconic image of Ariel surrounded by the waves as she hoists herself up on the rock and I thought it would be fun to recreate it on a card! :)
Lawnscaping July Solo 1
And it's me...so of course I had to make it interactive, too!  
Lawnscaping July Solo 3
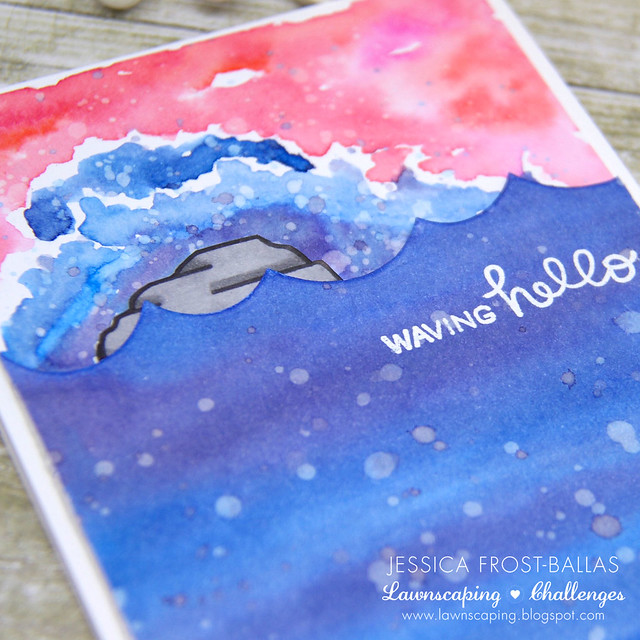
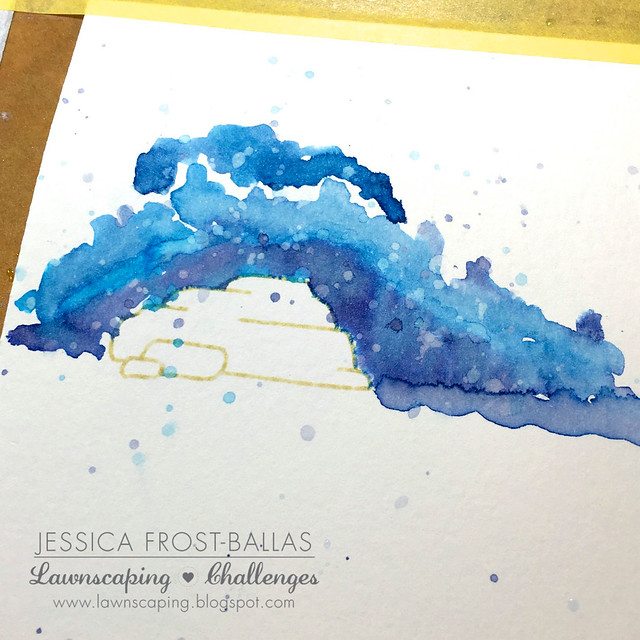
This was a really fun card to create though I was quite nervous about the outcome until it was totally done.  To start off I stamped the rock onto a piece of watercolor paper with antique linen distress ink as a guide for my eventual second layer.  Then I smooshed chipped sapphire, salty ocean, and mermaid lagoon distress ink onto my craft mat for my waves.  First I loosely watercolored a second sheet of watercolor paper with streaks of each color and set that aside to dry while I worked on the background.  I wet the paper around the rock and dropped distress ink into the water with a wet paintbrush allowing it to blend naturally.  I also made sure to leave parts of the paper dry so that it would stay white and resemble the crest and foam of the waves.  Once it was dry I flicked water droplets over the waves and blotted them off after a few seconds.  And I also flicked chipped sapphire and salty ocean distress ink droplets over the paper and let them dry.
lssneak
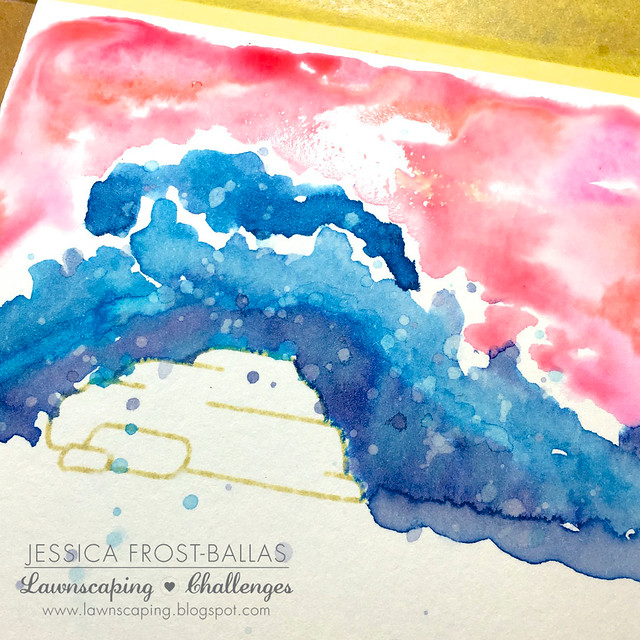
Next I smooshed abandoned coral, picked raspberry, and spun sugar distress ink onto a craft mat and repeated the process for the sky.  I added additional water droplets and more flicks of chipped sapphire and salty ocean distress ink.
lssneak2
Then I stamped the mermaid and the rock with copic-friendly ink and then colored them with copics.  I added a little shimmer to Ariel's bikini and tail with a spectrum noir sparkle brush.  Next I took two long, thin strips of navy blue cardstock and adhered them over the bottom of Ariel's tail to create a handle.  I stamped the sentiment onto the first piece of watercolor paper I painted and heat-embossed it with white embossing powder.  Then I used the ocean waves border die to die-cut the top of the paper and adhered the rock behind it.  I turned that over and added strips of foam mounting tape to it, leaving a channel where my handle could slide to move Ariel.  I adhered it to the background panel and then slid Ariel into the channel.  Finally I adhered the background panel to a white card base and the card was done! :)
Lawnscaping July Solo 2
I really like the contrast between the soft, dreamy quality of the distress inks and the sharper, bright copic markers.  It kind of reminds me of an old cartoon cel.  Anyway, that's my card and the story behind it! ;)  Thanks so much for visiting today and don't forget to enter the current Lawnscaping Challenge!  Have a wonderful day!
-Jess


Supplies:

Wednesday, June 22, 2016

Watercolor Waving Hello with Christy

Hey crafty friends! Good morning! It's Christy here with another card for our current challenge: Distress Mania! I created by background by blending on a whole bunch of Distress Inks, Antique Linen, Gathered Twigs, Tumbled Glass, Peacock Feathers, Salty Ocean, Evergreen Baugh, and a little Pine Needles. Then I took a paintbrush and flicked some water over top and blotted it away with a paper towel for an even more distressed look.

Then I watercolored my images from Mermaid For You with Zig Clean Color Real Brush Pens, popping some of them up with foam tape and gluing others flat to the card to create the look of dimension. I thought I was done, but while snapping the photos, the mermaid's tail was just crying for some glitter, so I added some Stickles for a fun pop of sparkle here and there.

I hope you enjoy it! You still have a week to play along in our Distress Mania challenge. Hope to see your projects there!


SaveSave

Tuesday, June 21, 2016

Waving Hello with Audrey!

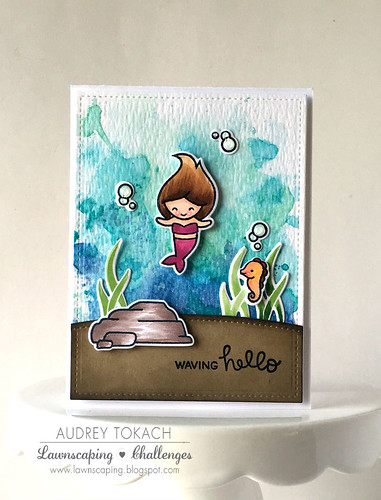
Hello there!  Audrey here!  Today I have a card to share with you that goes along with our current challenge... Distress Mania!  I used Distress Inks to "ink smoosh" my underwater background!  If you are not familiar with "ink smooshing", it's very easy to do and the results are so fun!  You will never get the same effect twice!  All you need are Distress Inks and a piece of acetate or old plastic packaging.  You can even use a sandwich bag.  You just press the ink pad onto the plastic, add a few squirts of water, and press the wet ink on to your paper.  I prefer to dry each layer before moving onto the next, but you don't have to if you prefer not to.  The colors will just mix together more.

Once my background was completely dry, I added a stitched edge with the largest die in the Small Stitched Rectangles Stackables die set.  I cut a second stitched rectangle from kraft cardstock, and used the Simple Stitched Hillside Borders to add a slope to my sand.  For added dimension, I added some Walnut Stain Distress ink to the edges with an ink blending tool.  I stamped and colored a mermaid, rock, seaweed and the cute little seahorse from the Mermaid for You stamp set and then diecut them using coordinating dies.  I adhered some pieces flat with a glue pen, and some with foam tape, and added a sentiment from the same stamp set.  Then I mounted the panel to a white card base using more foam tape.

Waving Hello

That's all for me today!!  Thanks for stopping by! :)