
Chrissie here to share a pretty simple way to make your dies even more versatile. I recently discovered how to deboss without cutting using my dies!
First, I started out by stamping the cute little paper airplane and trail from Flying By. I colored it in with Spectrum Noir markers, being careful to match the patterned paper I picked out (Daphne's Closet).

Then I grabbed the circle die I wanted (Quickutz) and placed it, cut side down onto the card. I adhered it in place using some washi tape.

Then, I flipped it over. Using my Cuttlebug, from the BOTTOM UP, this is the order:
A Plate
B Plate
Die
Cardstock
3 pieces of scrap cardstock
Tan Mat
B Plate

Once it comes out, gently pull up the washi tape (it could rip since so much pressure was applied) and you have a debossed image!

For this card, I wanted to deboss multiple times, so I ran the die through over and over again until I had the pattern I wanted.
The final card:
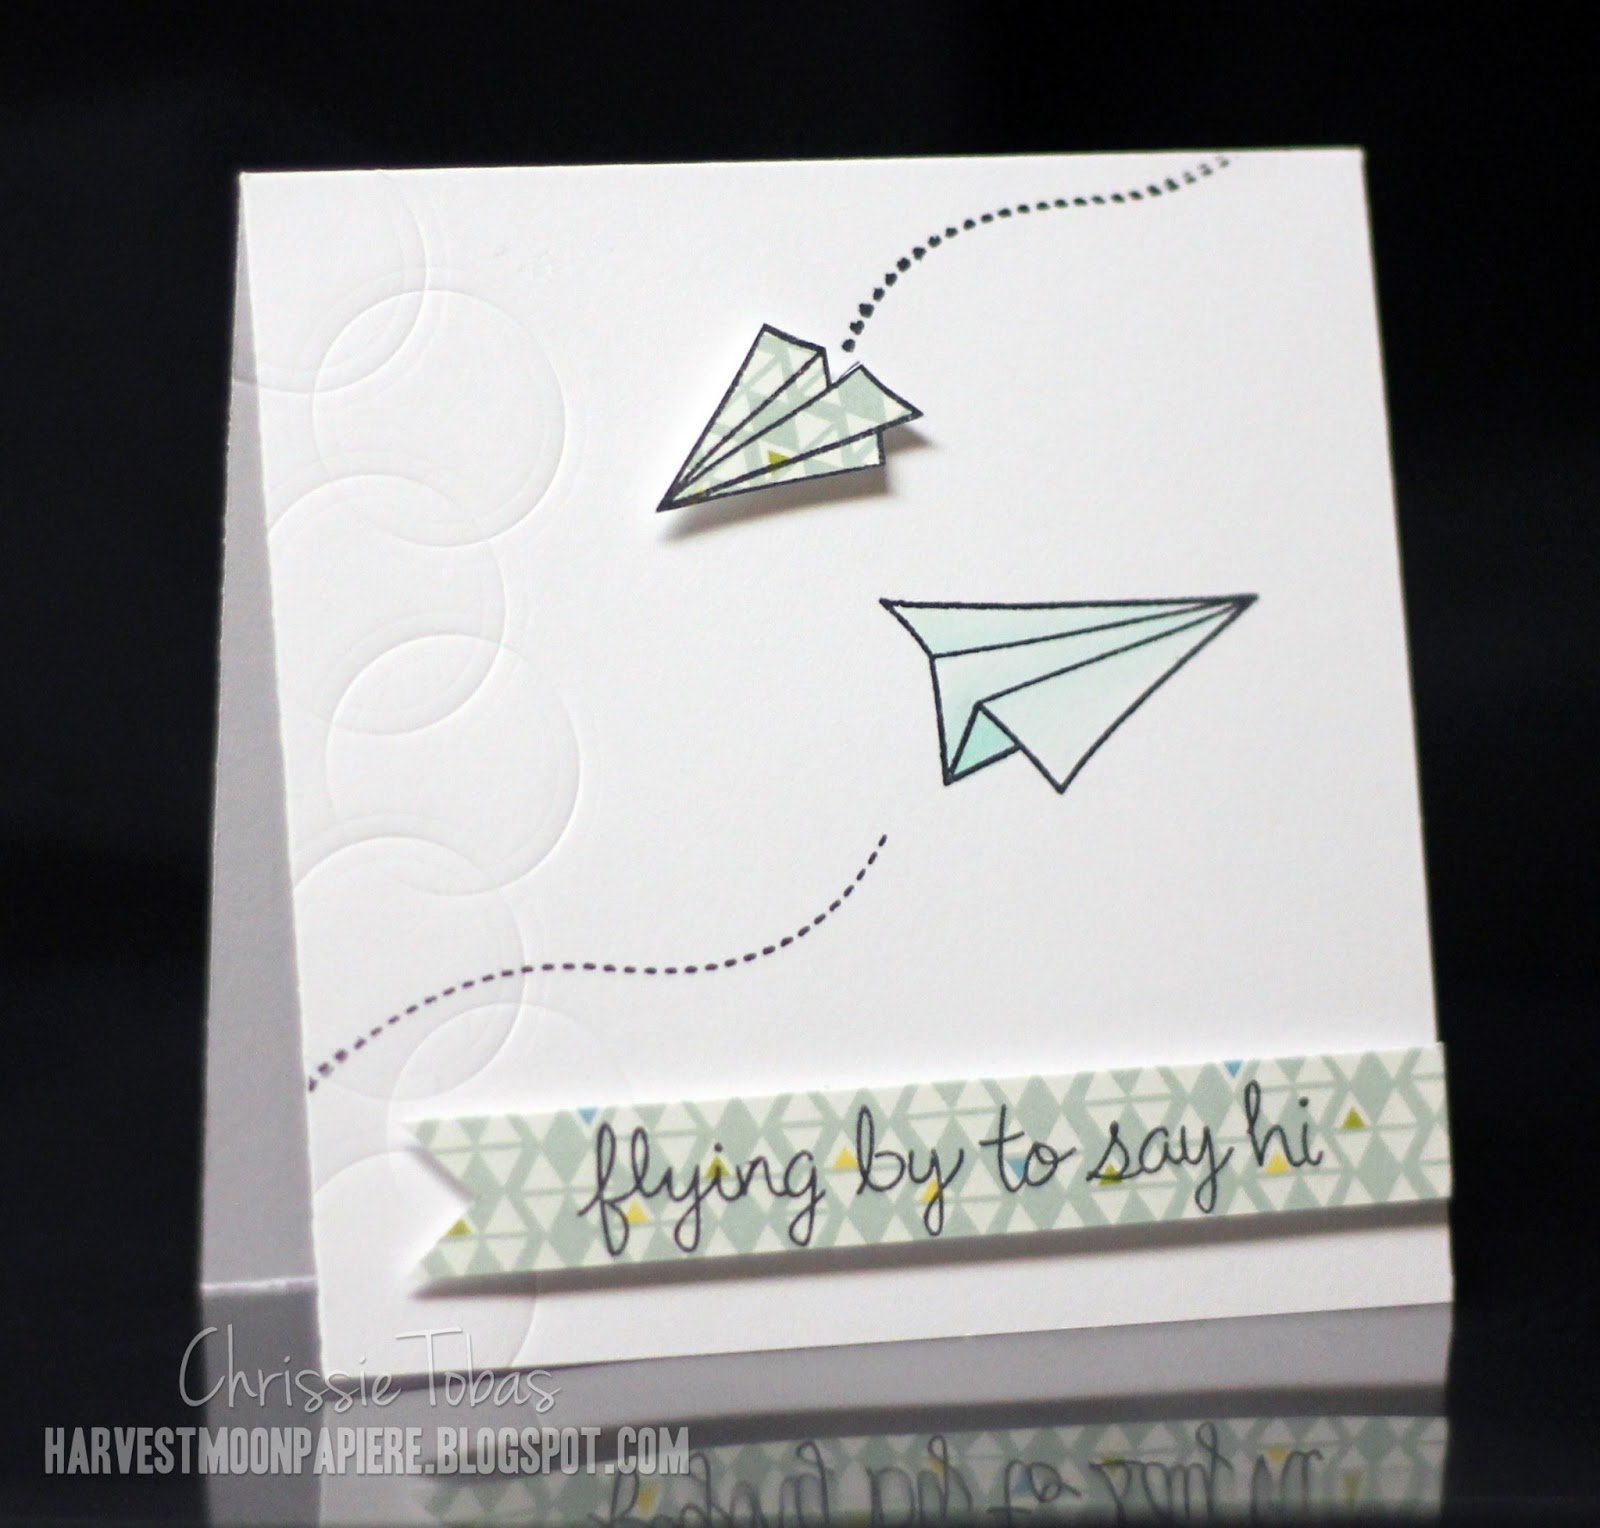
And this view shows the debossing a little better:

I figured now that Lawn Fawn has so many amazing dies out, this is the perfect technique to use (and excuse to buy those dies!)!!
Thanks for stopping by and don't forget to play along with our current challenge, Inspired By!


 |  |  |

Very cool! I haven't done this for a long time, thanks for the reminder!! And how fun now that Lawn Fawn has so many cute dies!!
ReplyDeletethat is really really cool!! and your card is so fun!! LOVE that paper pieced airplane!! thank you SO much for sharing!
ReplyDeleteDEBOSSING..I love it but did not know how to create it.
ReplyDeleteTHANKS for sharing!
cool! I've often wondered if this would work but haven't yet tried it! TFS!
ReplyDeleteI've always wondered how debossing was done. Thanks
ReplyDeletefor sharing.
very cool! thanks for the sandwich recipe :)
ReplyDelete-Rachel w k
rwkrafts.blogspot.com
that is so cool, you always have the coolest tricks!
ReplyDeleteI was wondering what the recipe would be for doing this using my big shot. I am very new to using the big shot and would definitely appreciate knowing. Thank you and thanks for teaching me something new!
ReplyDeleteSarah, I am not familiar with the Big Shot - I've only used my Cuttlebug. I am assuming they are pretty similar, though. I would suggest maybe trying the same combo, but maybe with less cardstock first, just to see how the impression is. If it seems too tight, don't force it through - you could break your machine. I have also heard that if you don't have the Tan Mat, you can go to a hardware store and ask for a Plumber's Mat. Basically, I used the normal combo I use with an embossing folder, but I added the 3 pieces of cardstock along with the mat. Does that make sense?
ReplyDelete:)
Thank you Chrissie, I appreciate your help. I'll try it out. =)
ReplyDeleteGood luck! And let me know if it works! I'd love to see your project(s) you make with it.
ReplyDeleteYou can email me at harvestmoonpapiere@gmail.com
I can update this post and add your test to it! :)